
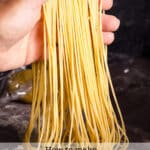

Homemade pasta is such a treat and, once you master the basics, it's surprisingly easy and fun to make. This step-by-step picture tutorial will walk you through all the details of how to make a perfect batch of delicious homemade pasta.

There's nothing like homemade pasta. Most of the dried pasta options in our local markets are made simply from flour and water. Fresh homemade pasta is made with eggs instead of water, boosting the flavor and the nutritional value by adding protein and vitamins A and D.
And, honestly, making pasta is both easy and fun! Here's everything you need to know to make homemade pasta.
Ingredients Needed to Prepare this Recipe
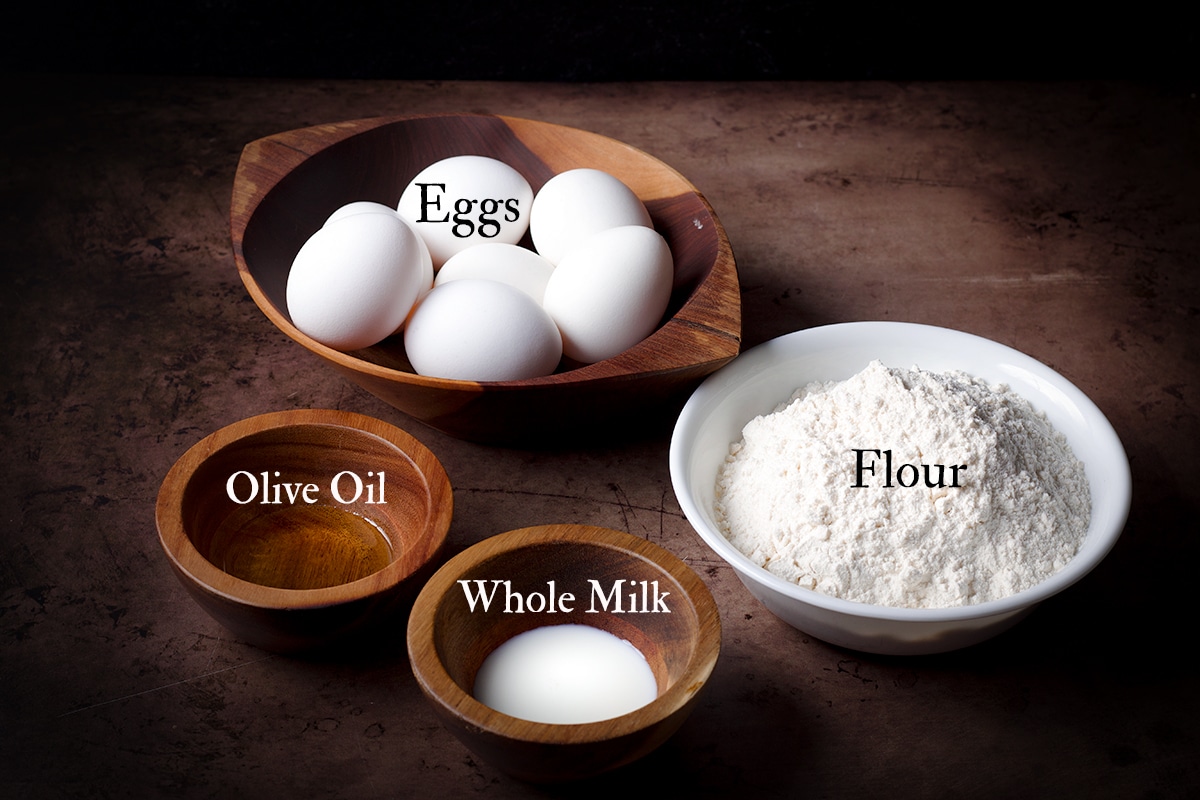
- 1 Whole Egg + 6 Egg Yolks
- Flour. I almost always use unbleached all-purpose flour but semola and “00” flour are also great choices.
- Extra Virgin Olive Oil
- Whole Milk
This recipe includes more eggs than many homemade past recipes plus a small amount of both olive oil and whole milk. Over the years I've experimented with different combinations of whole eggs and egg yolks and much prefer pasta with a high proportion of egg yolks.
Egg yolks contain most of the flavor in eggs. They are also rich in protein and fatty acids, which gives pasta a rich, silky, toothsome texture that's hard to beat.
Step-by-step photos and instructions
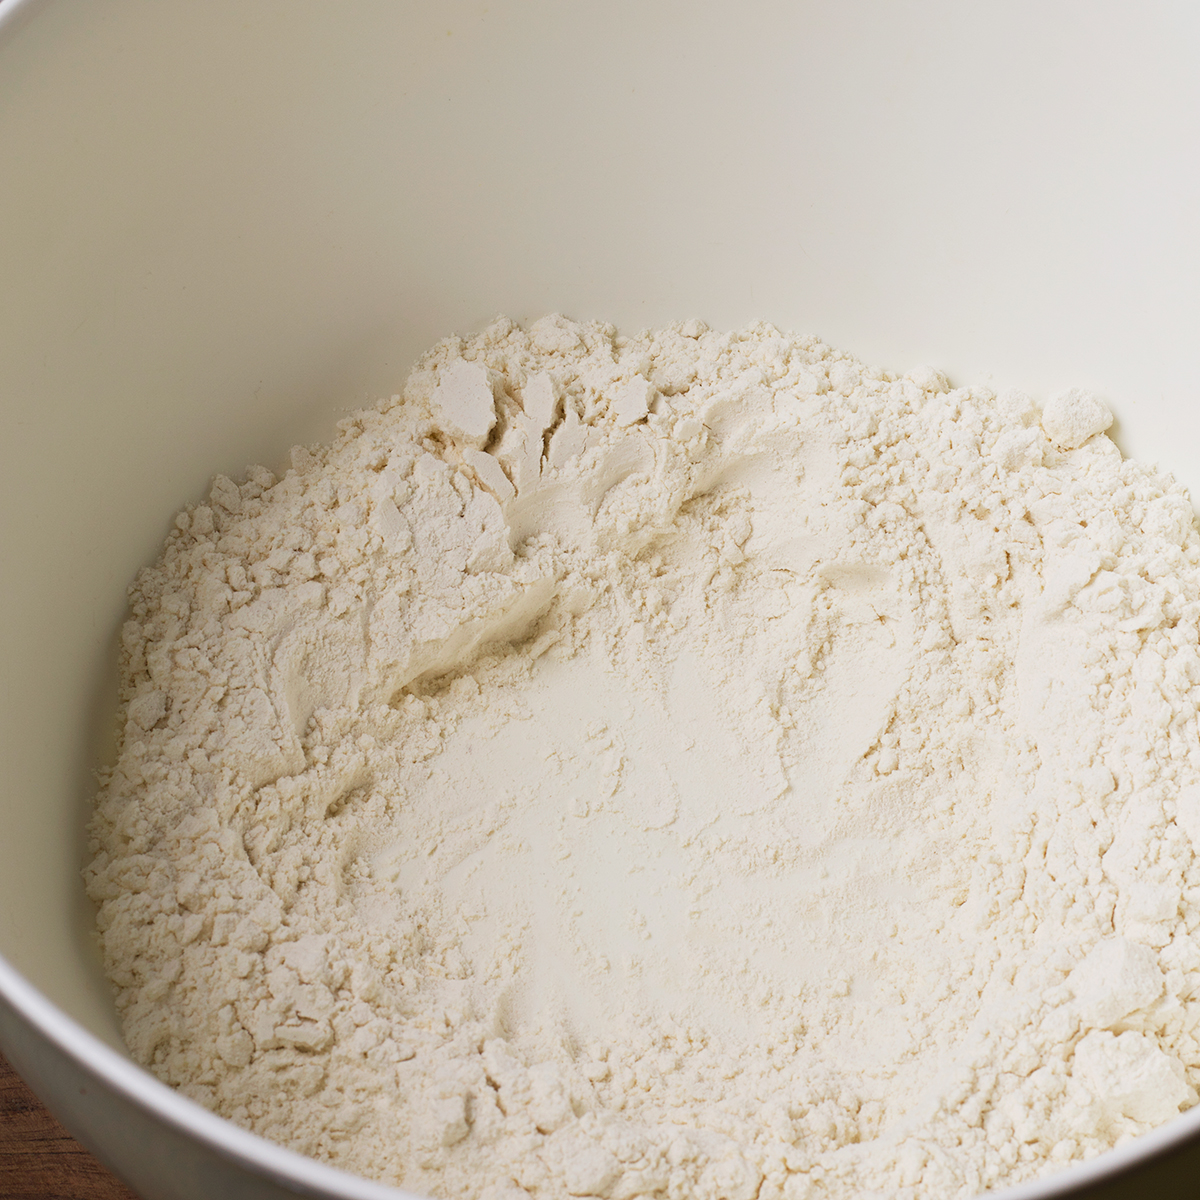
You can mix the dough directly on a clean work surface or in a bowl. I usually start the dough in a bowl then transfer it to my countertop to knead. Regardless, start by adding the flour to a large bowl or in a pile on a work surface. Use your hands to create a well in the center of the flour that's large enough to contain the eggs.

Crack the egg and egg yolks into a bowl and use a small whisk or a fork to break them up and blend them together.
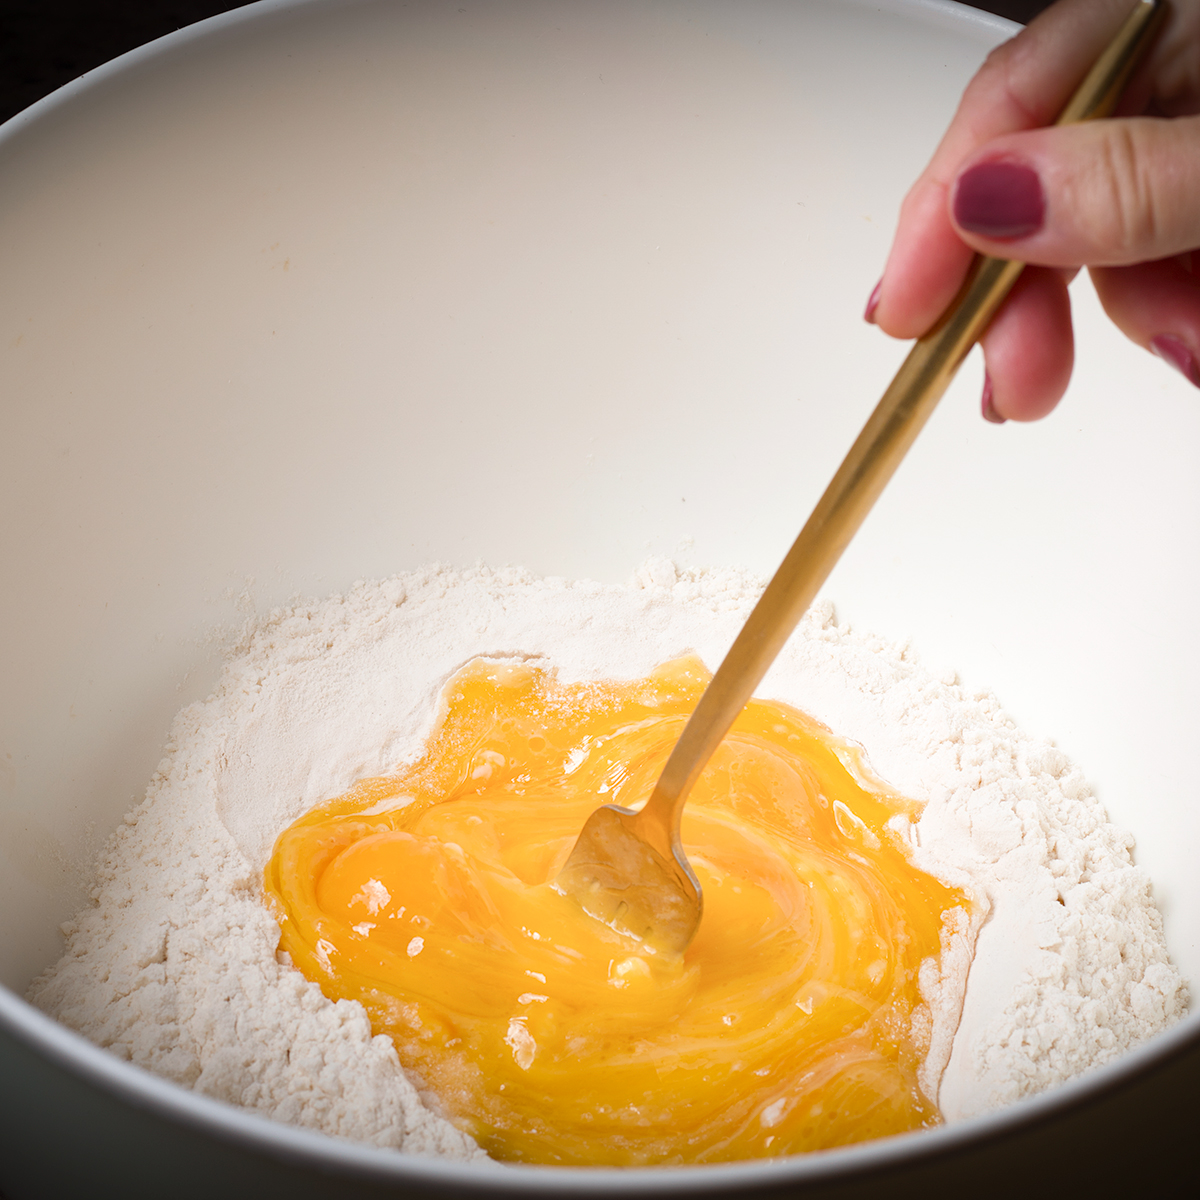
Pour the eggs into the well you created in the flour and add the milk and olive oil. Use a fork to slowly begin to whisk the eggs into the flour.
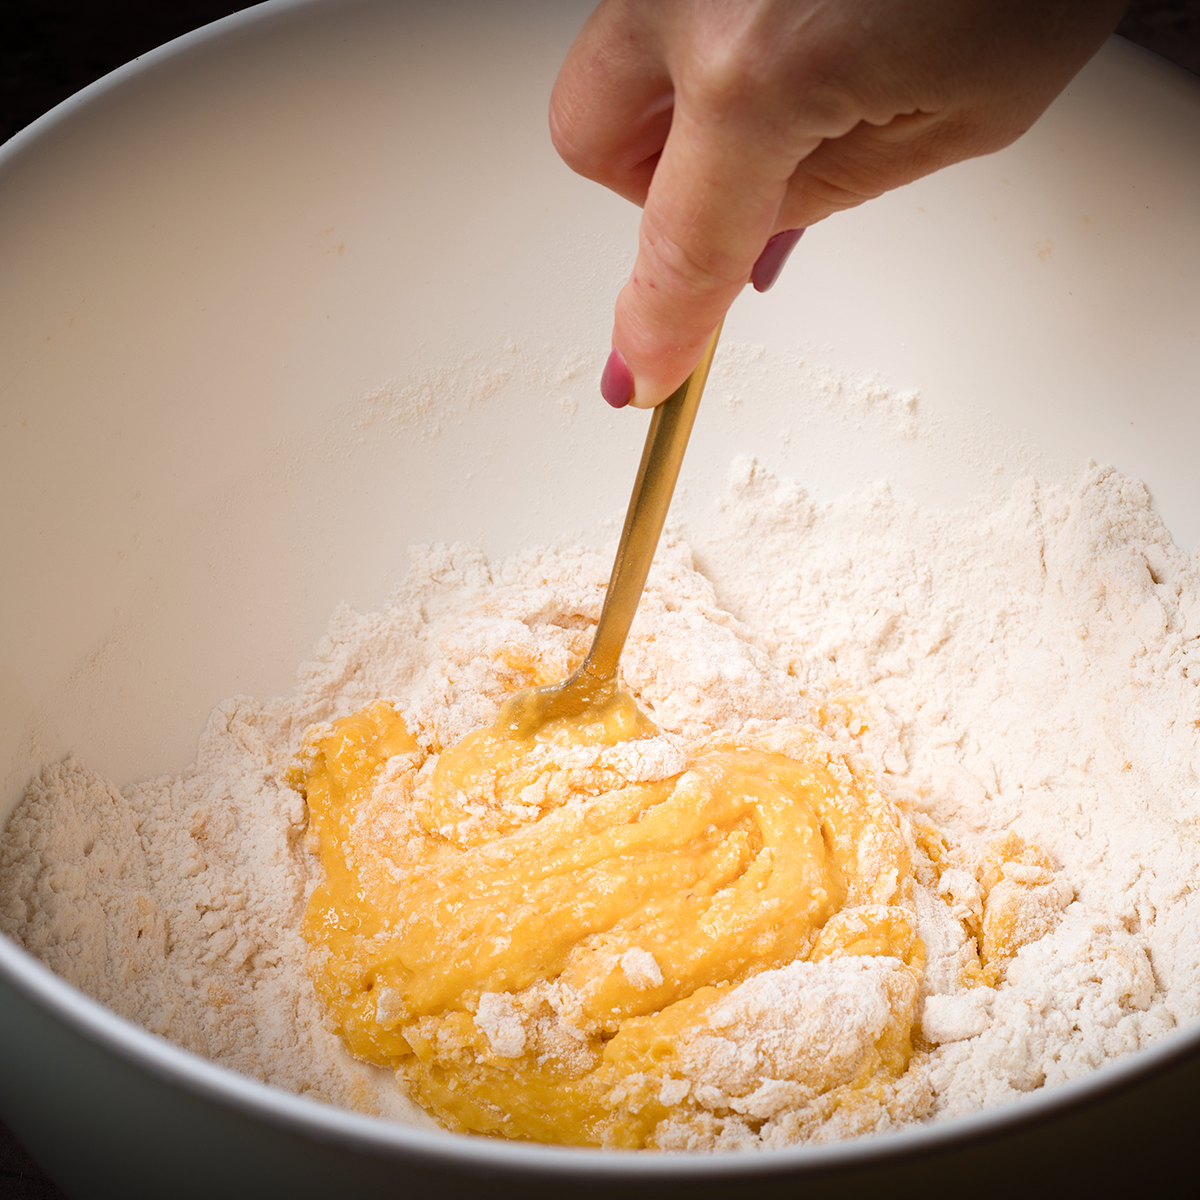
As you continue to incorporate more flour into the eggs, the mixture will begin to turn into a dough. Mixing the flour into the eggs bit by bit will help to create a smooth dough from the start.
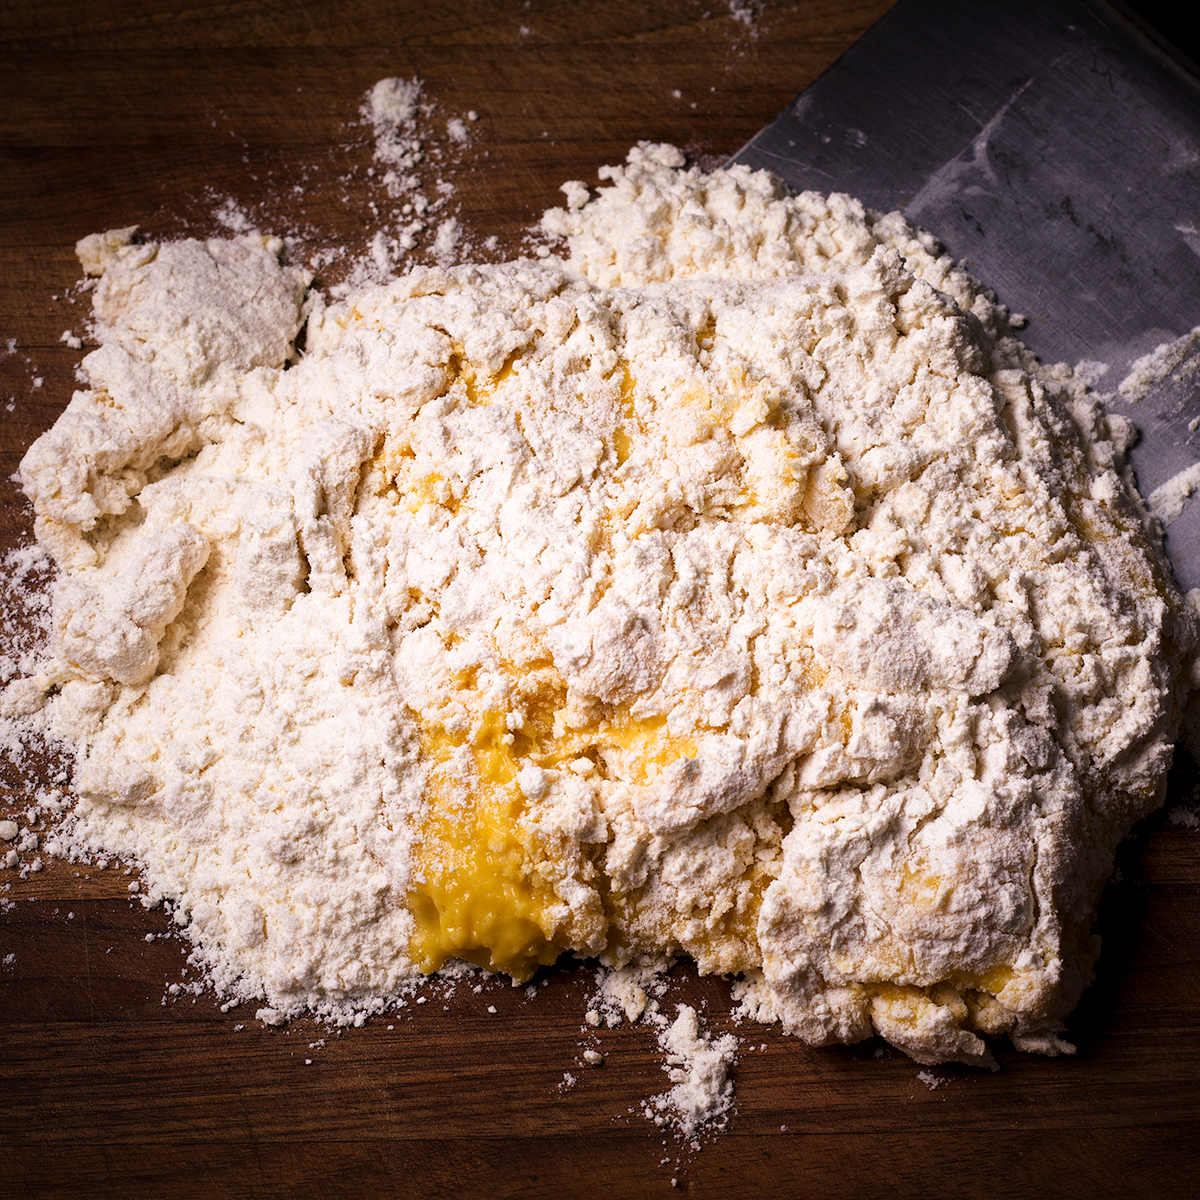
Dump the whole mess out onto a clean work surface when it becomes thick and difficult to whisk.
At this point, it's unlikely that all of the flour has been incorporated, which is ok.
Use your hands to knead the dough, incorporating as much flour as possible. The goal is to continue to add enough flour to get a dough that is smooth and pliable but not sticky.
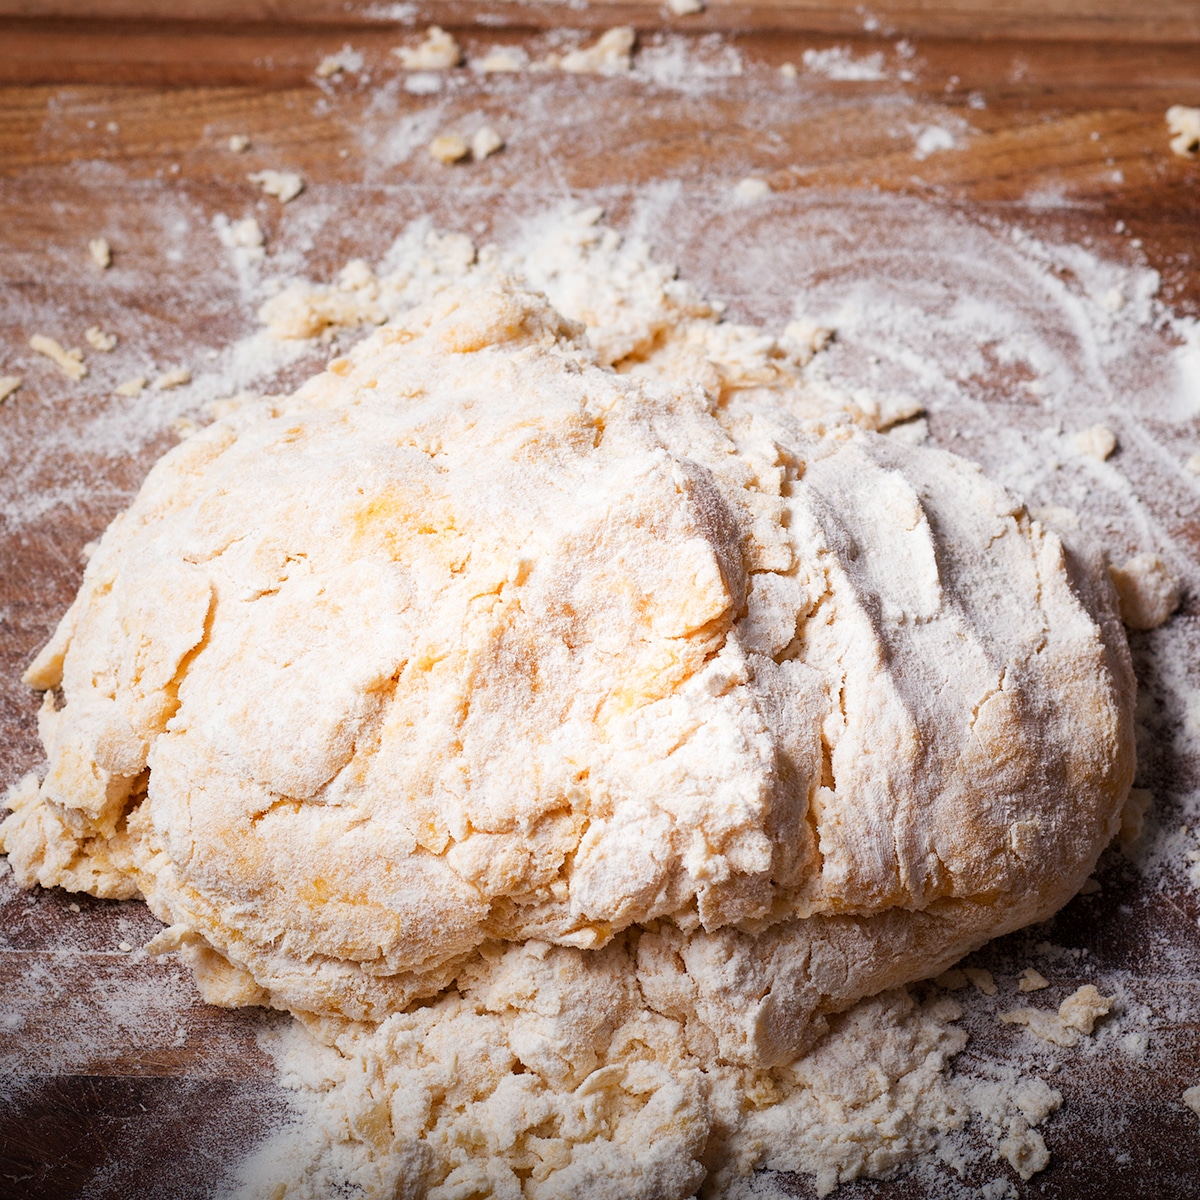
It's important to knead the dough for at least 10 minutes. The dough will be soft at first; as you knead, incorporate more and more of the flour.
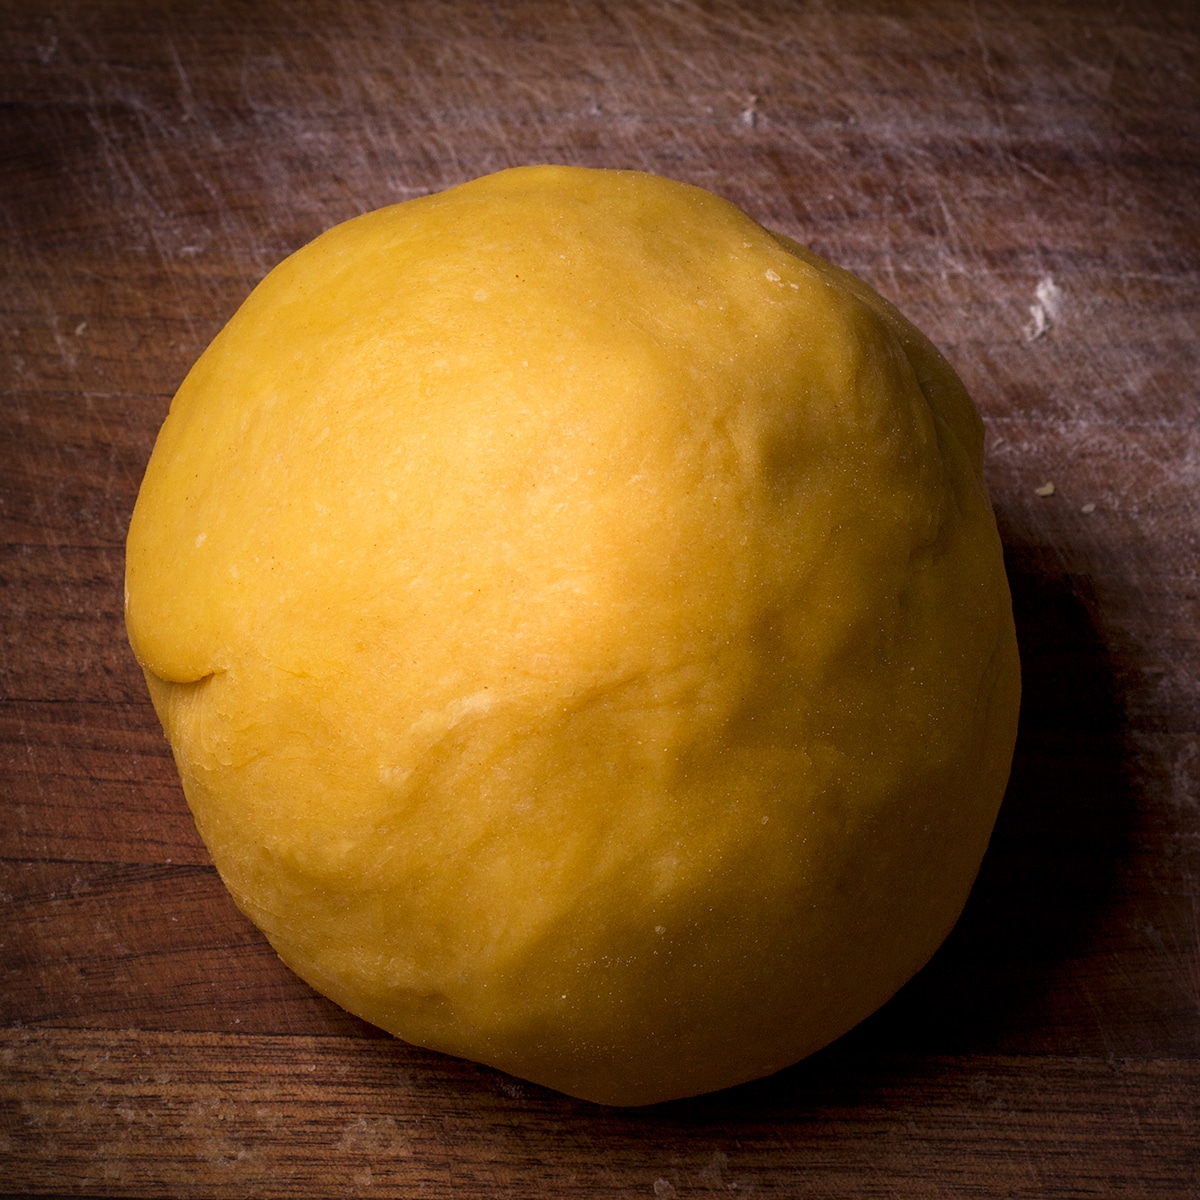
Continue kneading until you have a smooth elastic ball of dough that is not sticky at all, but not so dry that it's cracking. This will take at least 10 minutes.
If you slice the dough with a sharp knife, you should see very few air bubbles.
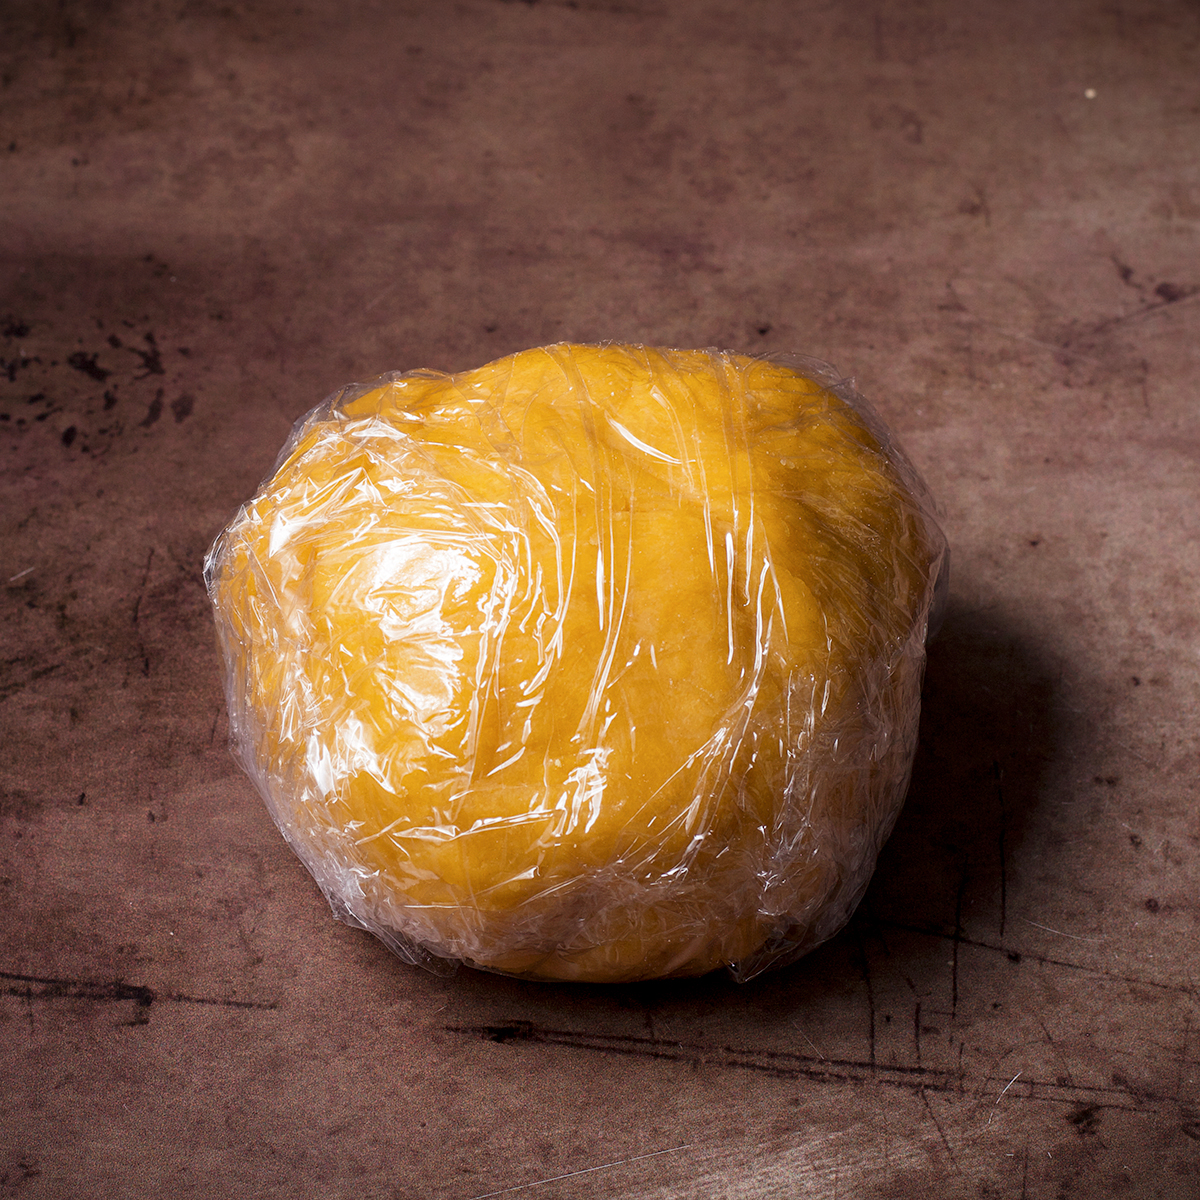
Wrap the dough tightly in plastic wrap and place it in the refrigerator. Allow it to rest in the refrigerator for at least 5 hours and up to a week.
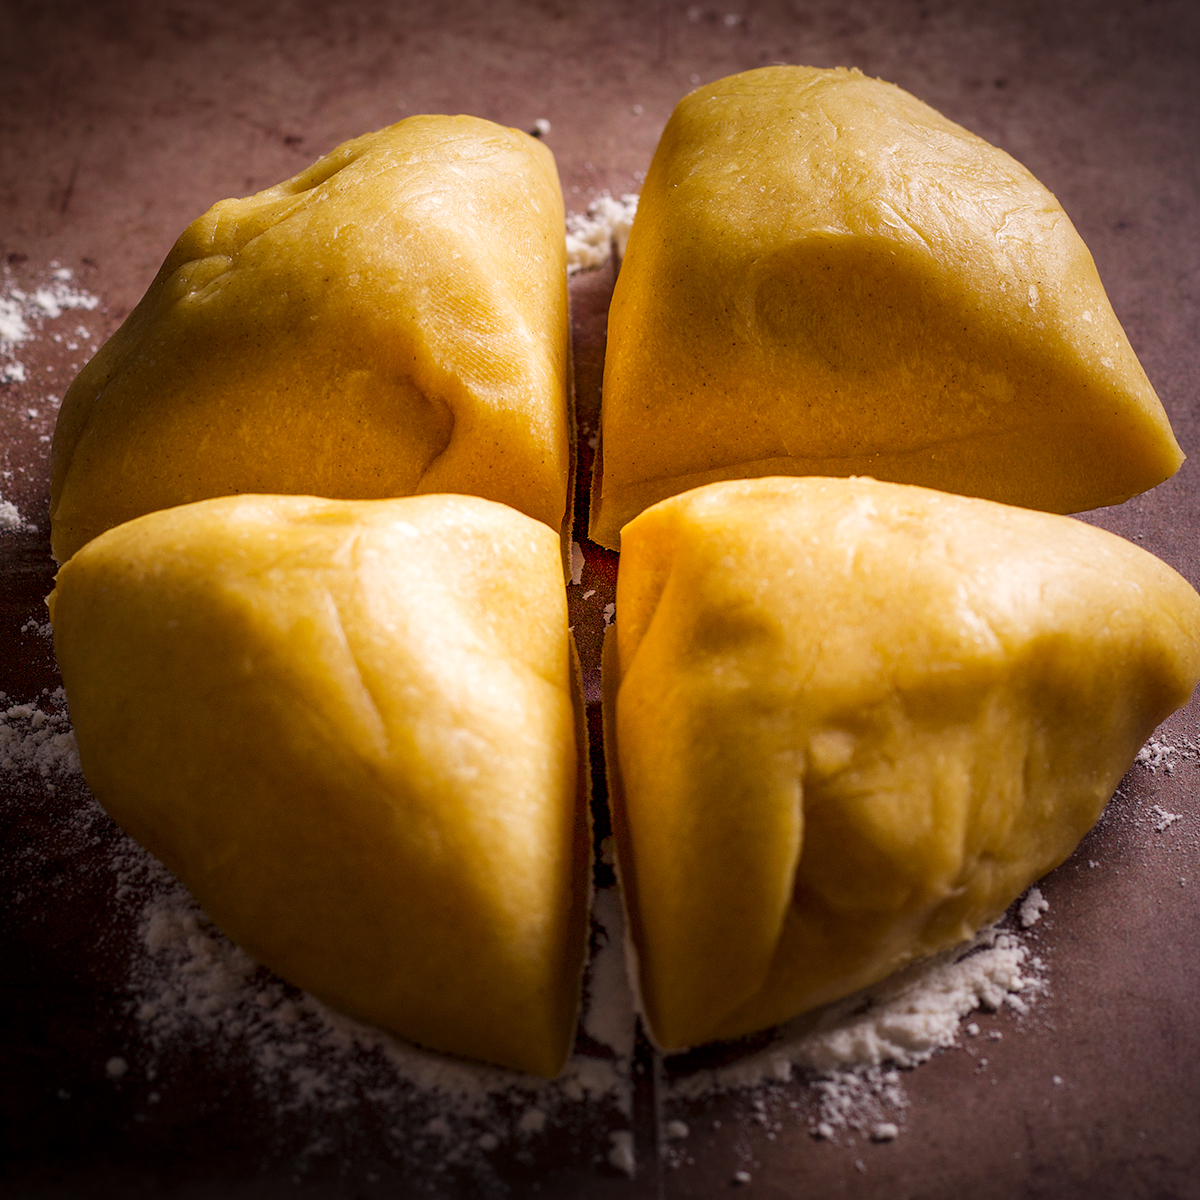
When you're ready to roll out the dough and cut it into noodles or lasagna sheets, remove it from the refrigerator, unwrap it, and set it on a surface that's been dusted with flour.
Cut it into 4 equal pieces. Work with one piece at a time, keeping the remaining dough covered.
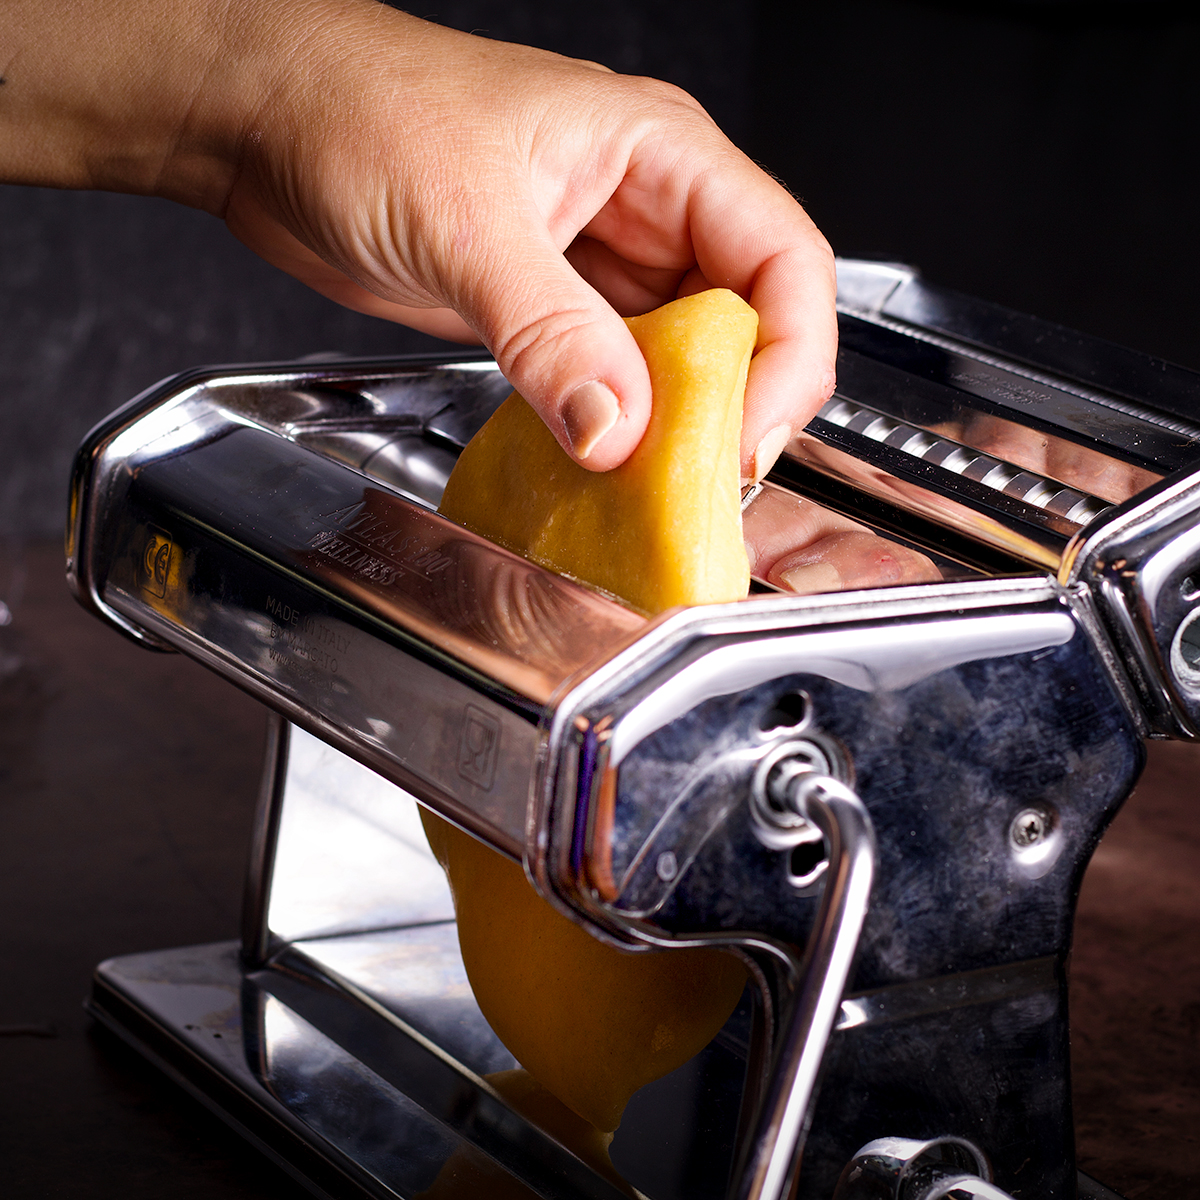
Take one piece of dough and feed it through the rollers of a pasta machine set to it's widest setting. On my Marcato Pasta Maker, this means setting the rollers to "0".
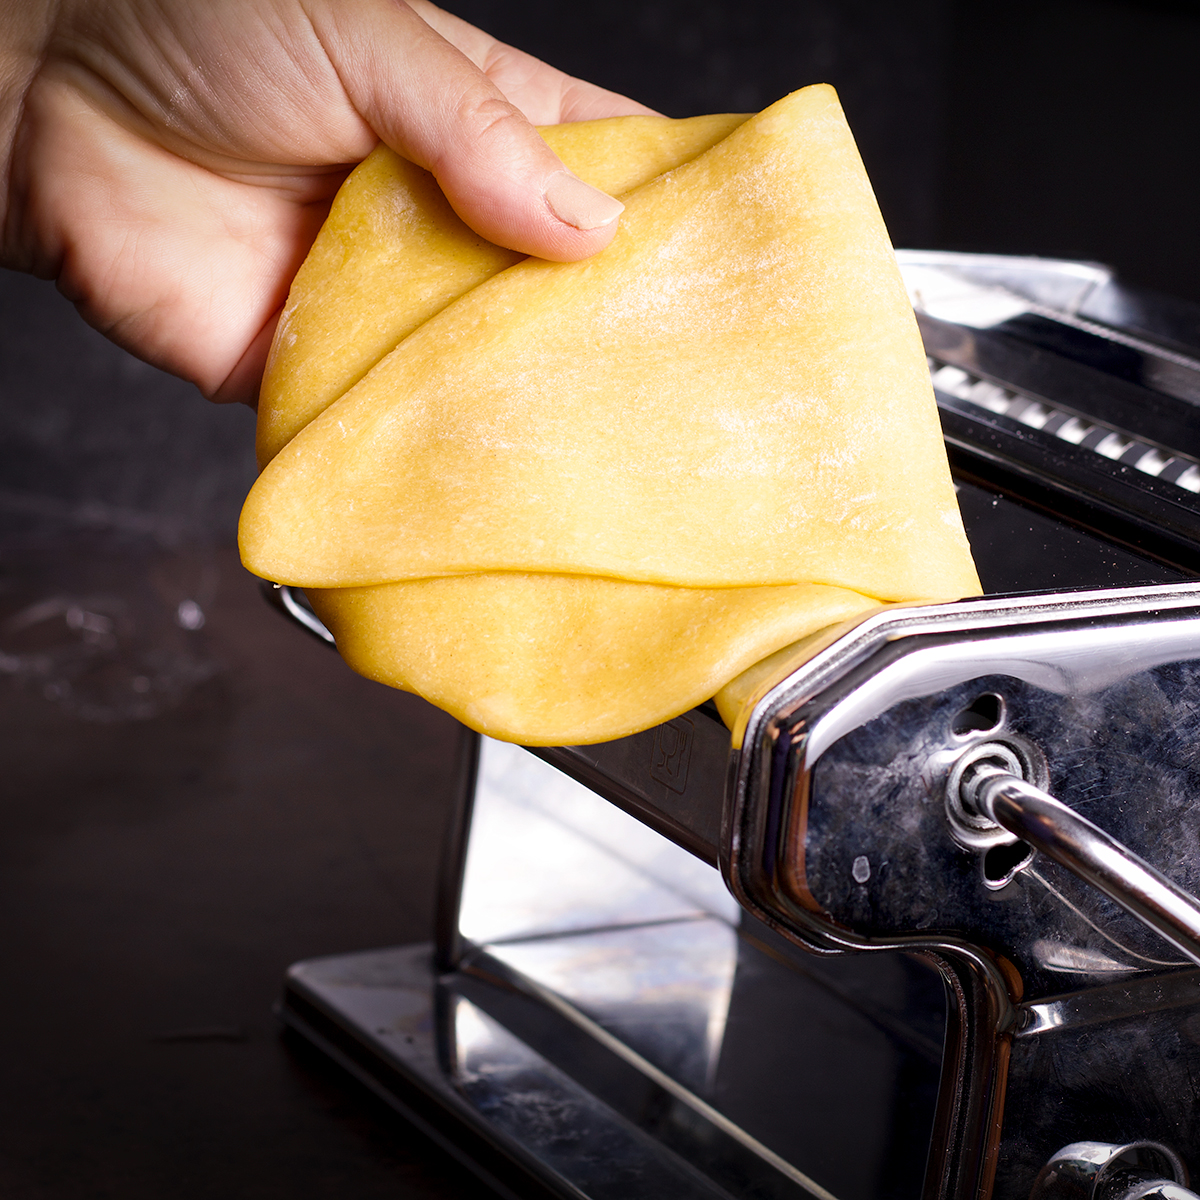
After rolling it through the machine, fold it in half and roll it through again.
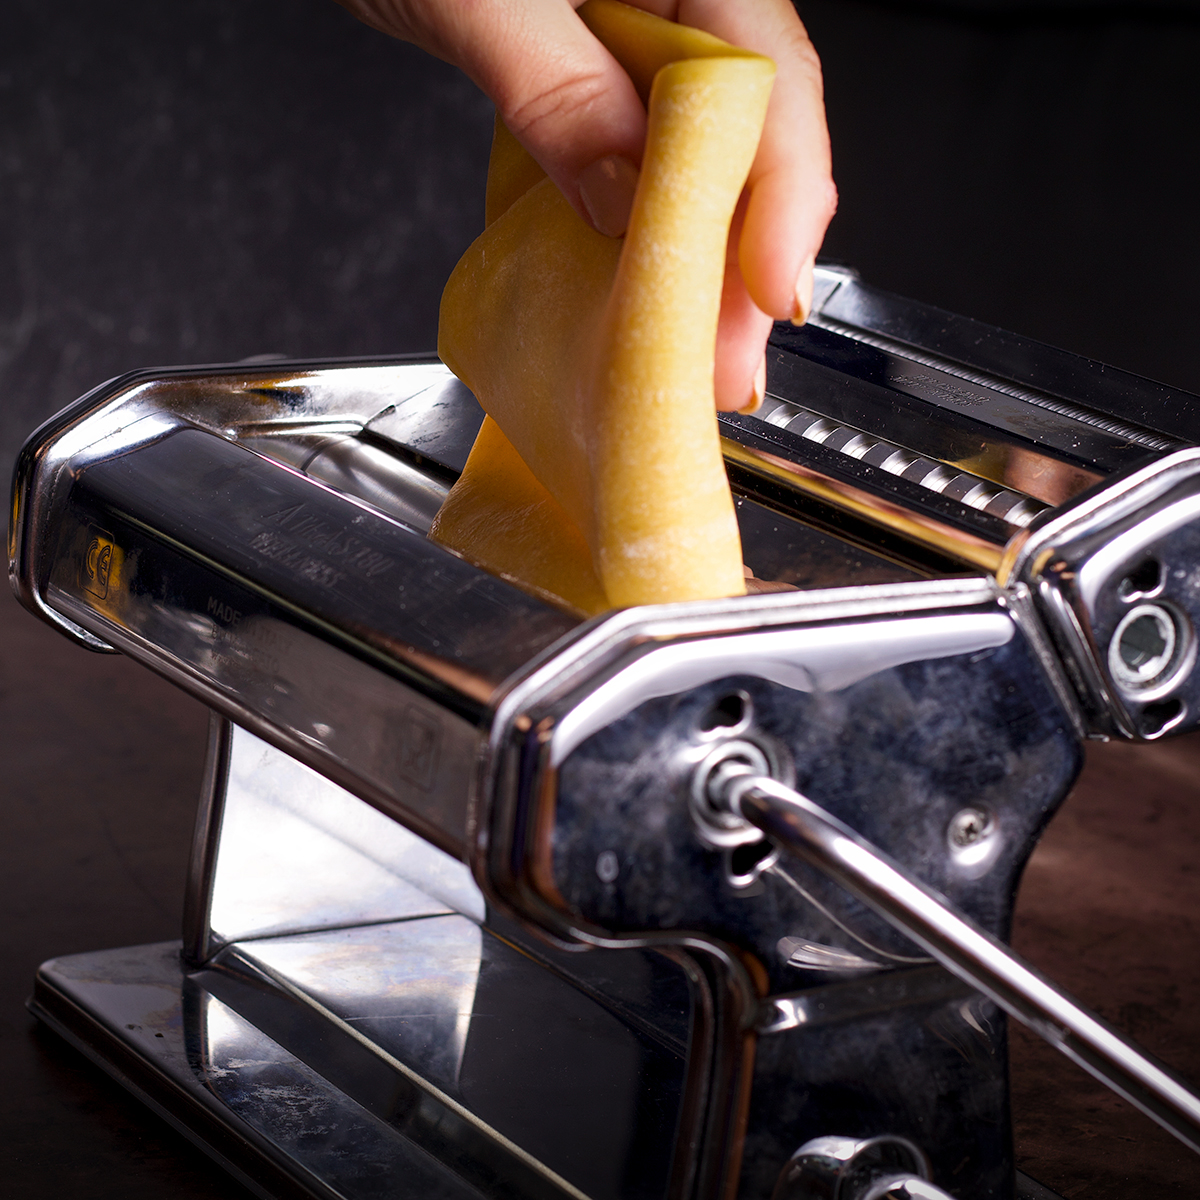
Continue this process of folding the dough in half and feeding it through the rollers with the machine at it's widest setting another 8 - 10 times. If at any point, the dough gets sticky, dust it with flour.
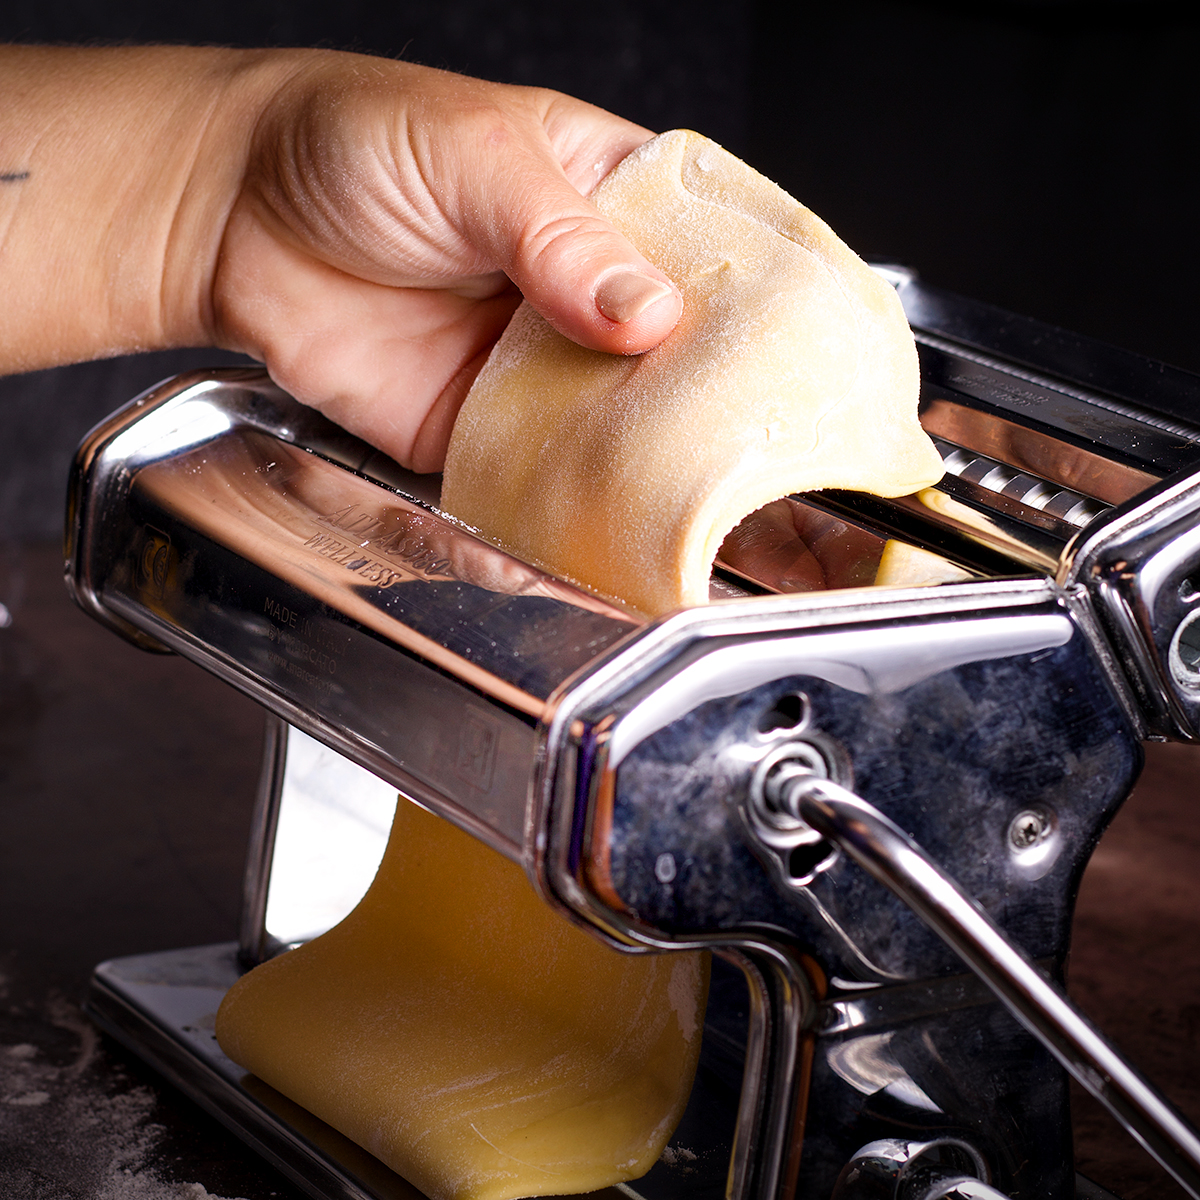
Now it's time to roll the pasta into a thin sheet that can be cut into noodles. Continue to feed the dough through the machine's rollers as you slowly narrow the width of the rollers. On my machine, the widest setting is "0", so I first narrow the rollers to "1" and feed the dough through then narrow it to "2" and feed it through again, and so forth.
Dust the pasta with flour as often as necessary to keep it from feeling sticky.
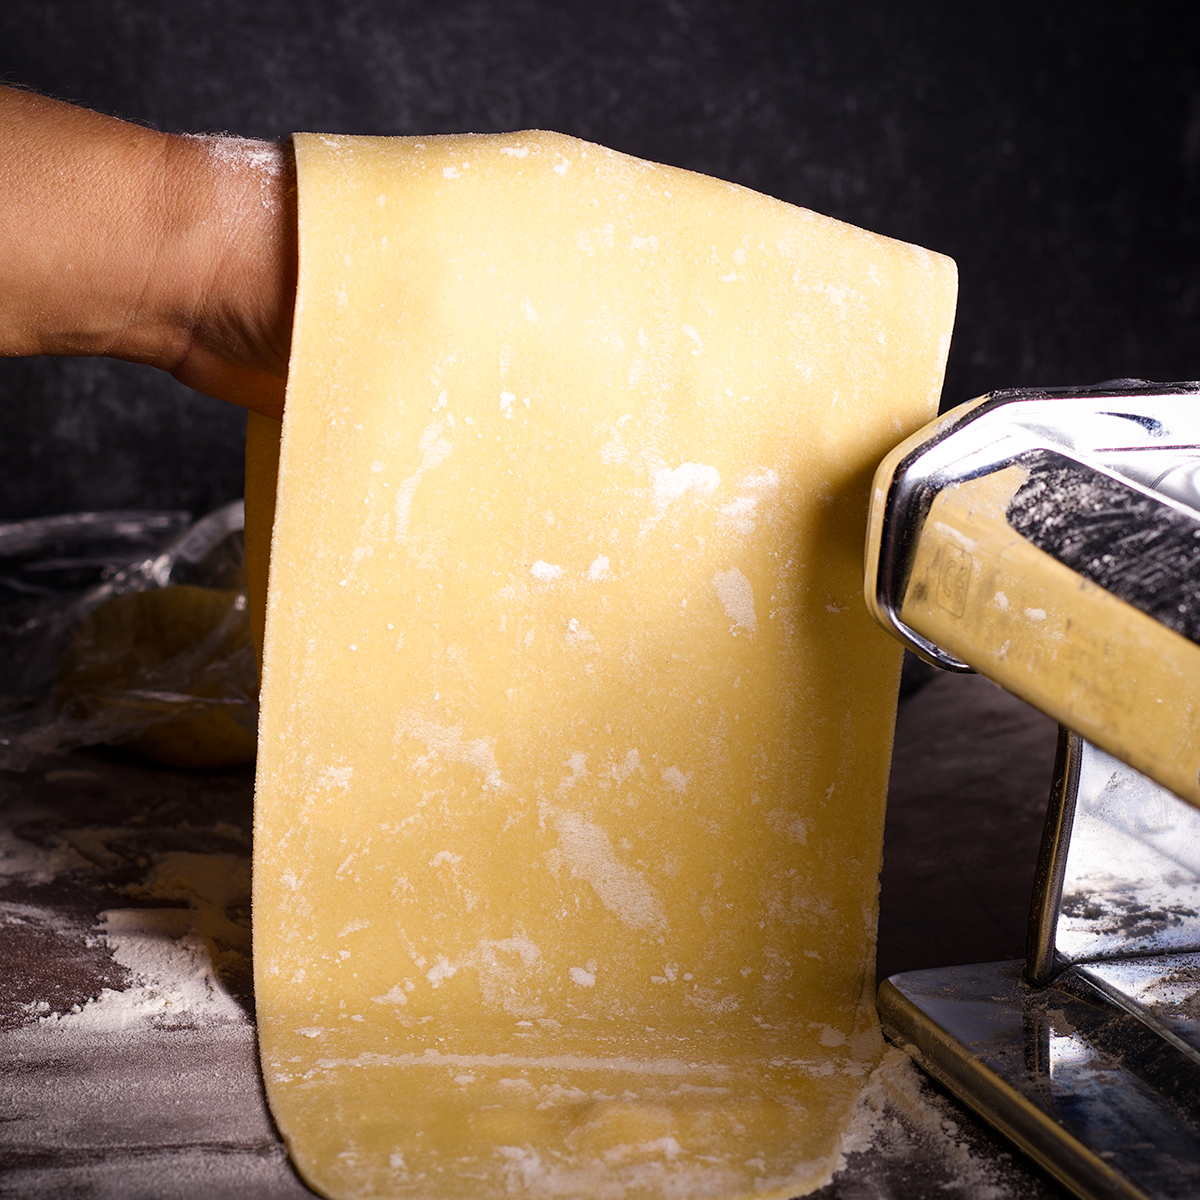
I rarely roll the pasta thinner than setting "4" or "5" on my machine because I prefer fat, chewy noodles. But, this is a matter of personal preference, so experiment to discover how thin you prefer the pasta to be before cutting it into noodles.
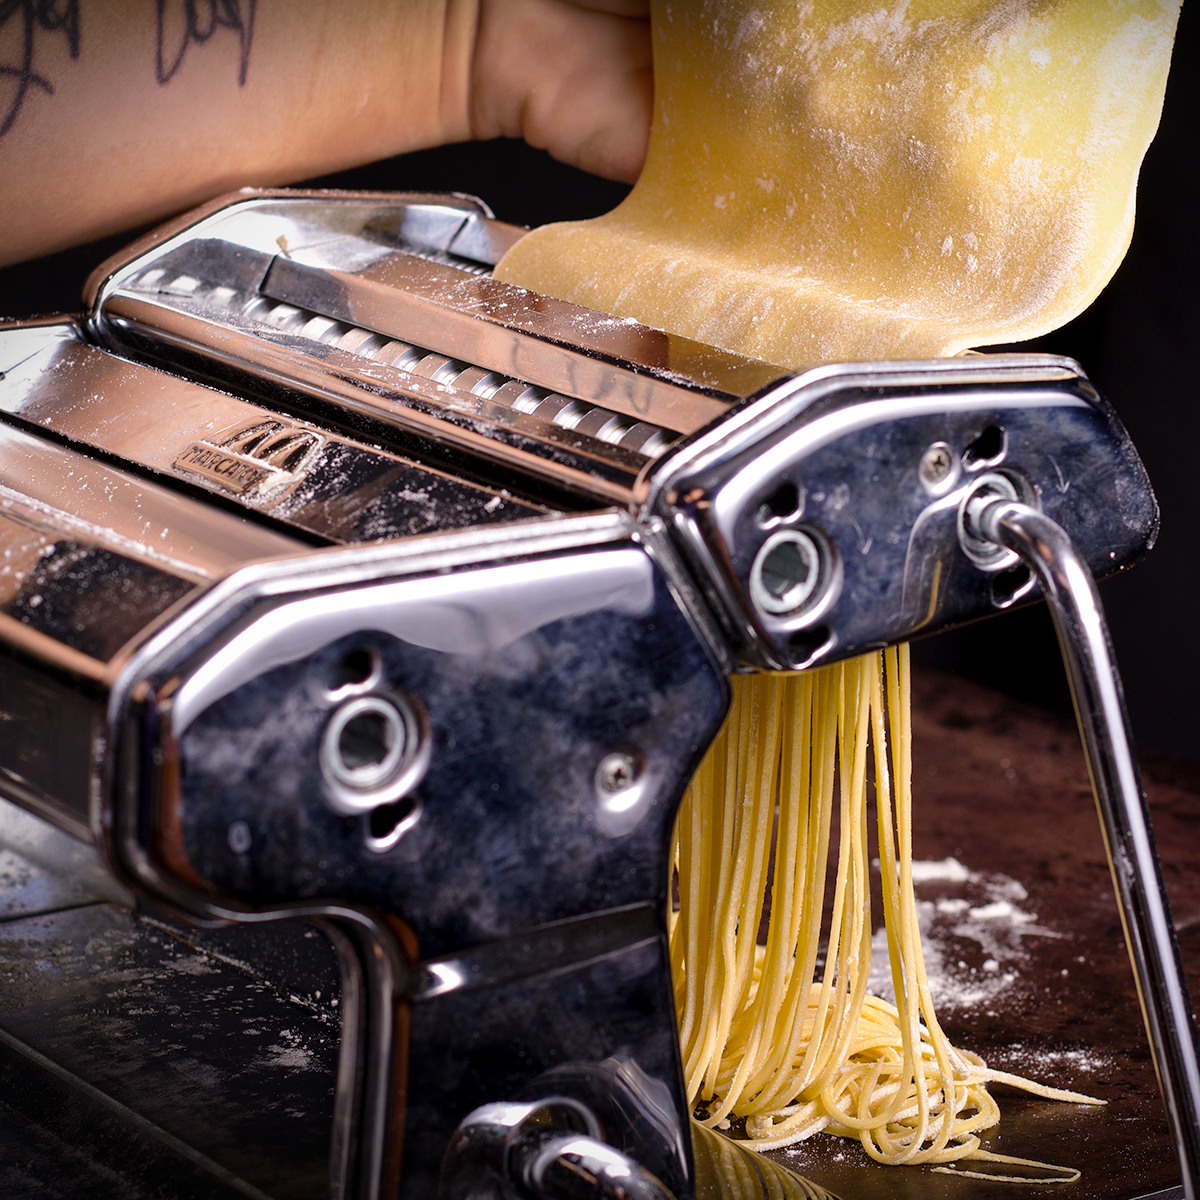
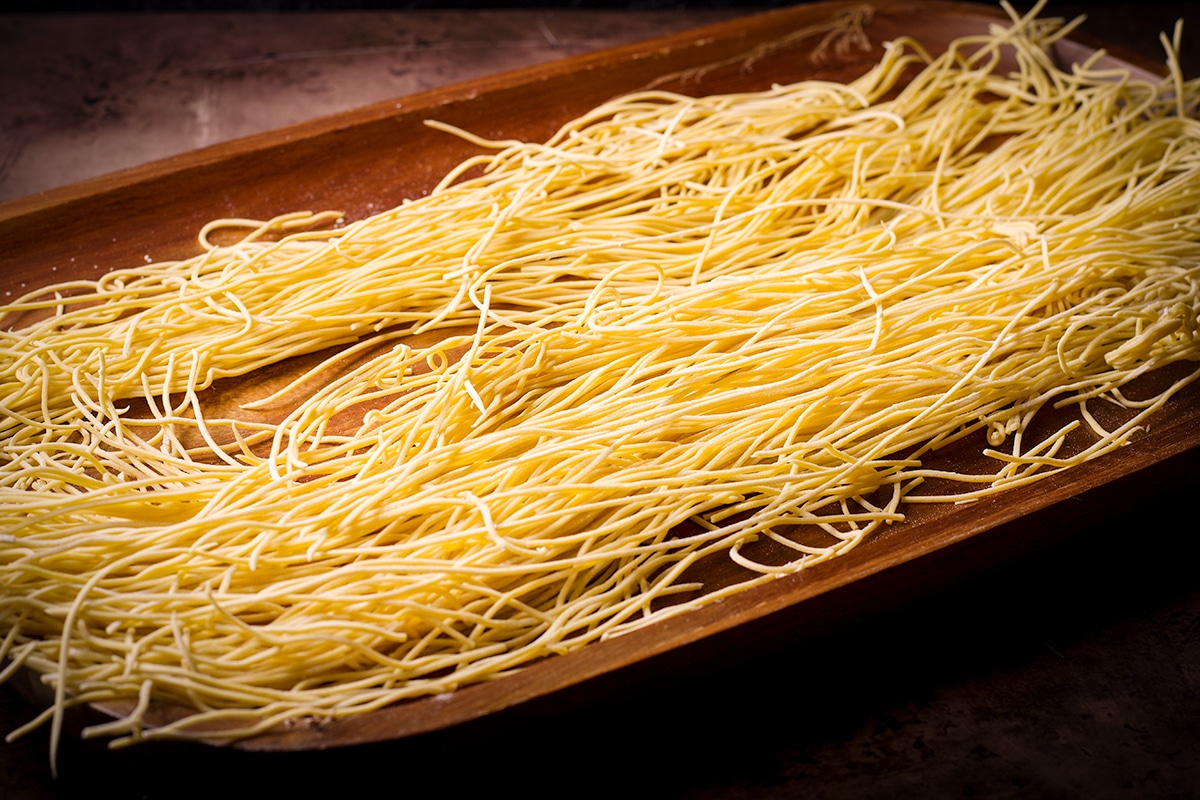
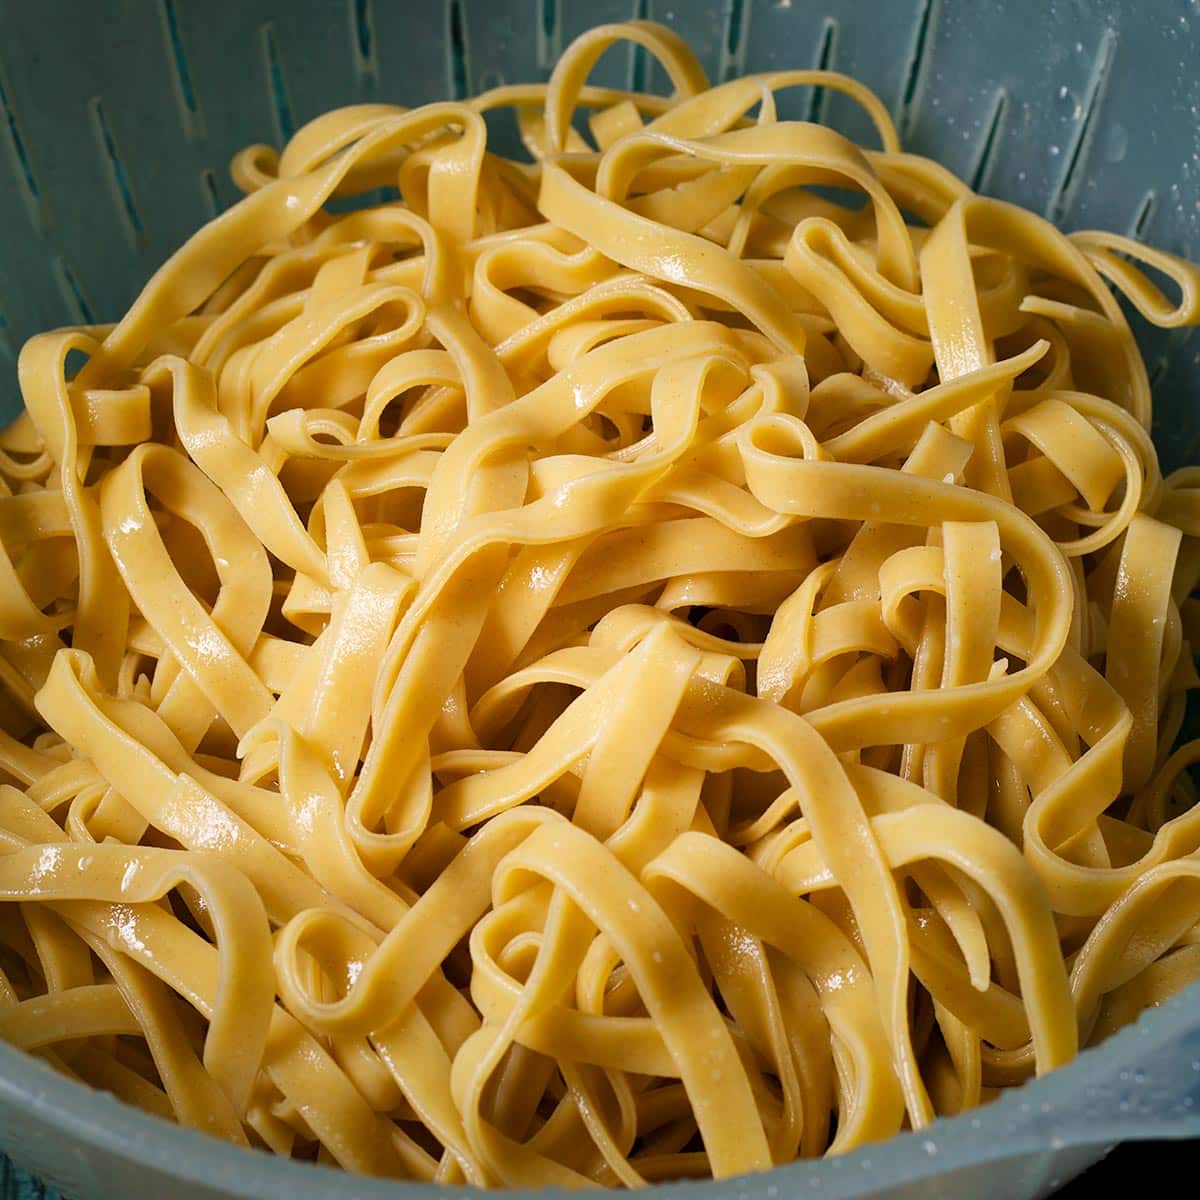
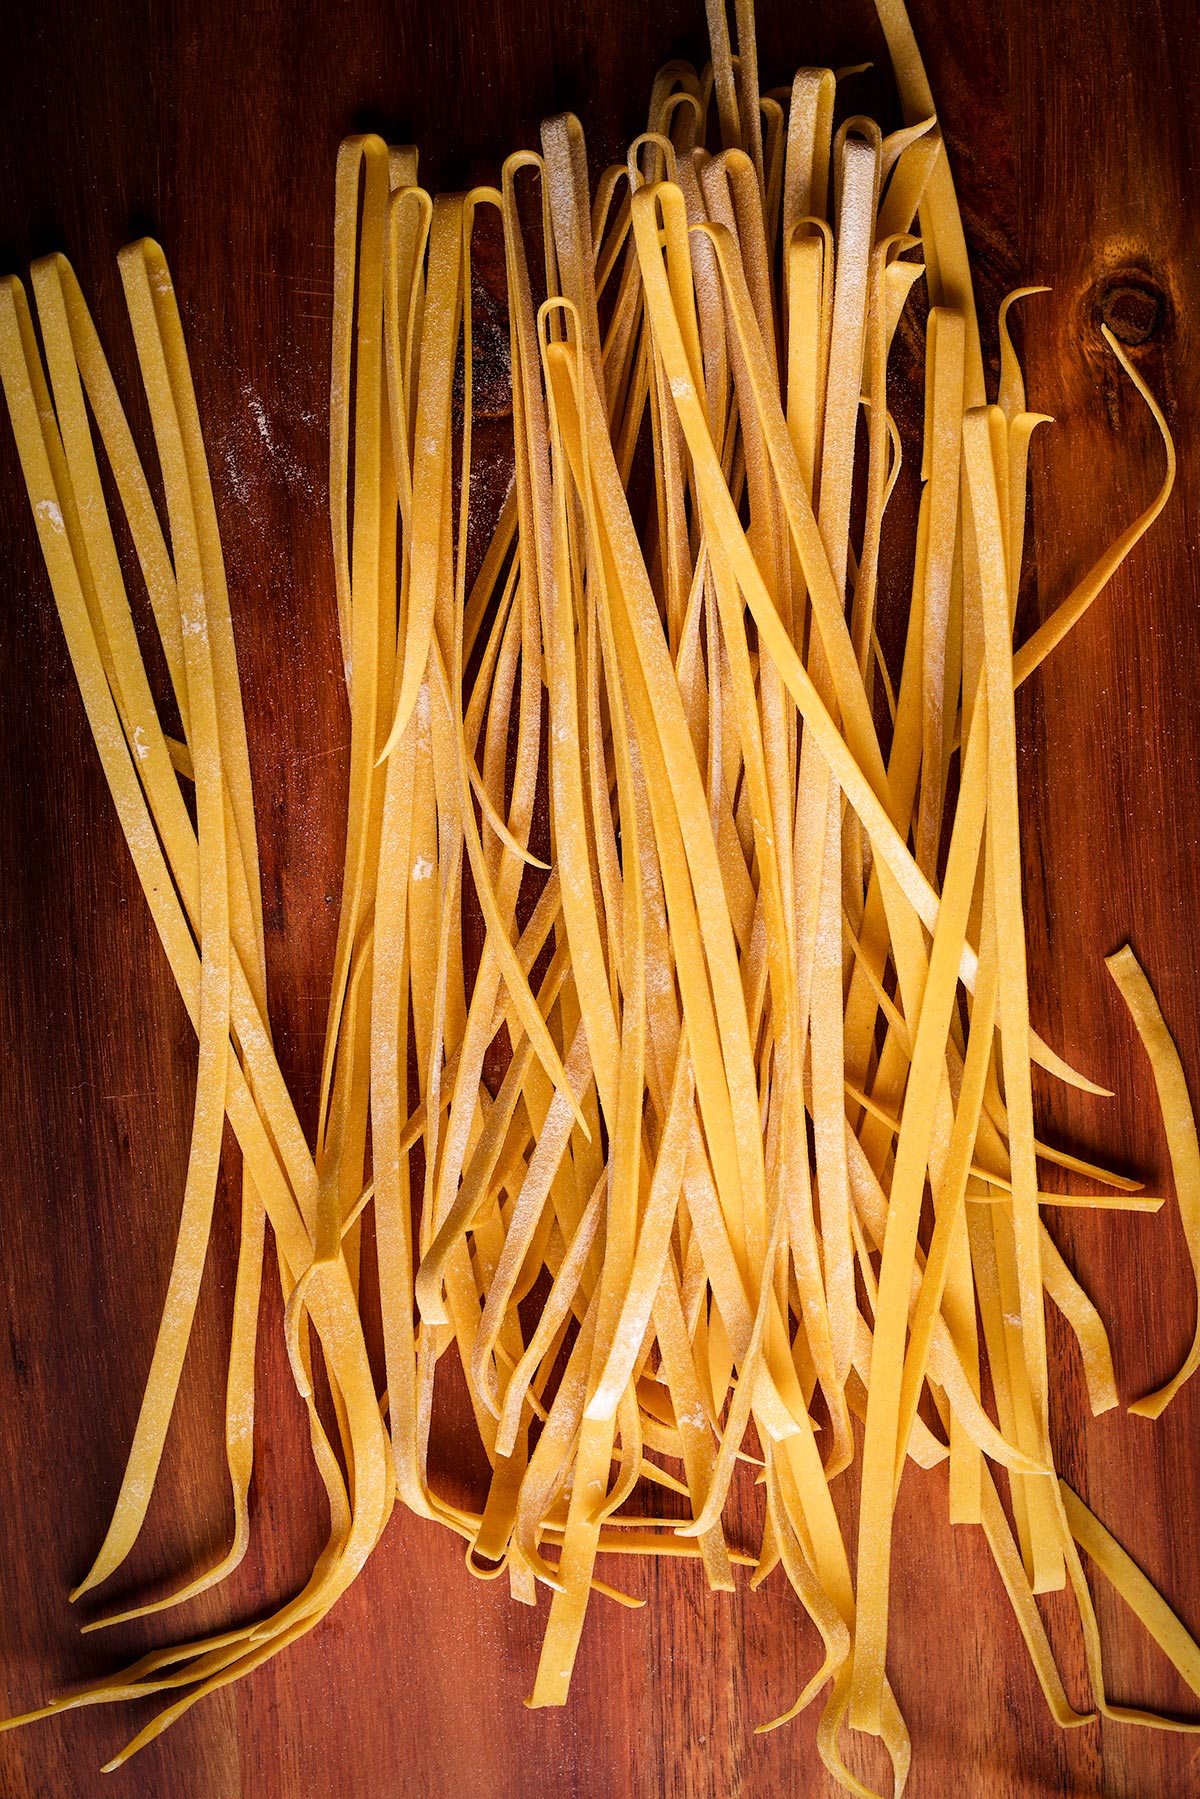
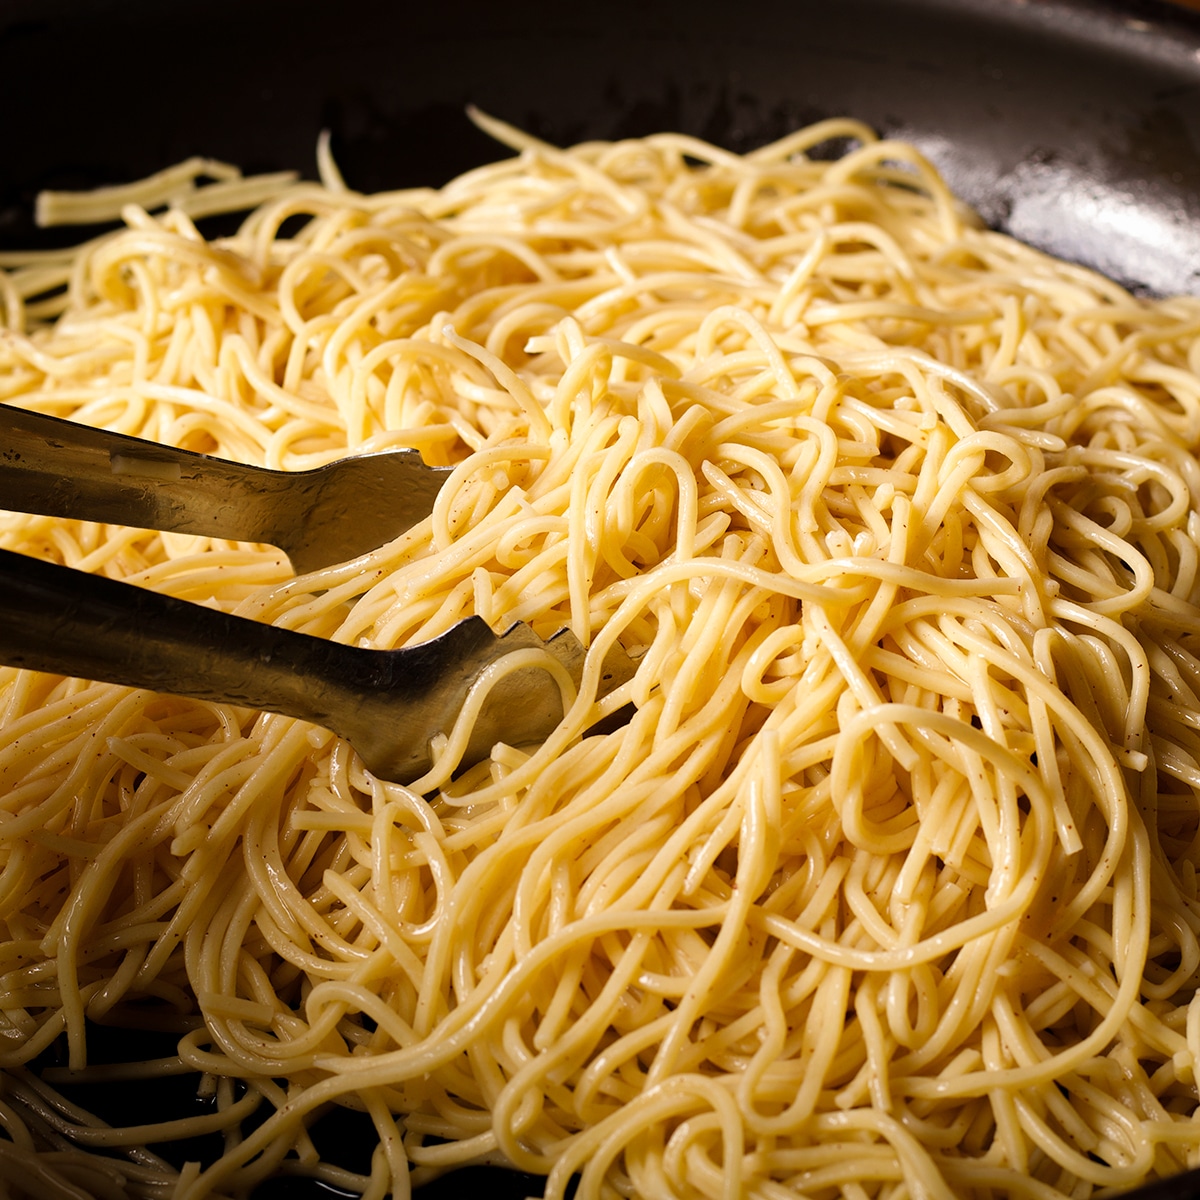
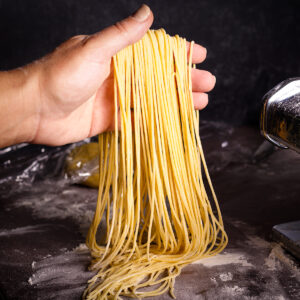
Roll the sheet of pasta through the noodle cutting attachment to cut it into strands of spaghetti or fettuccini.
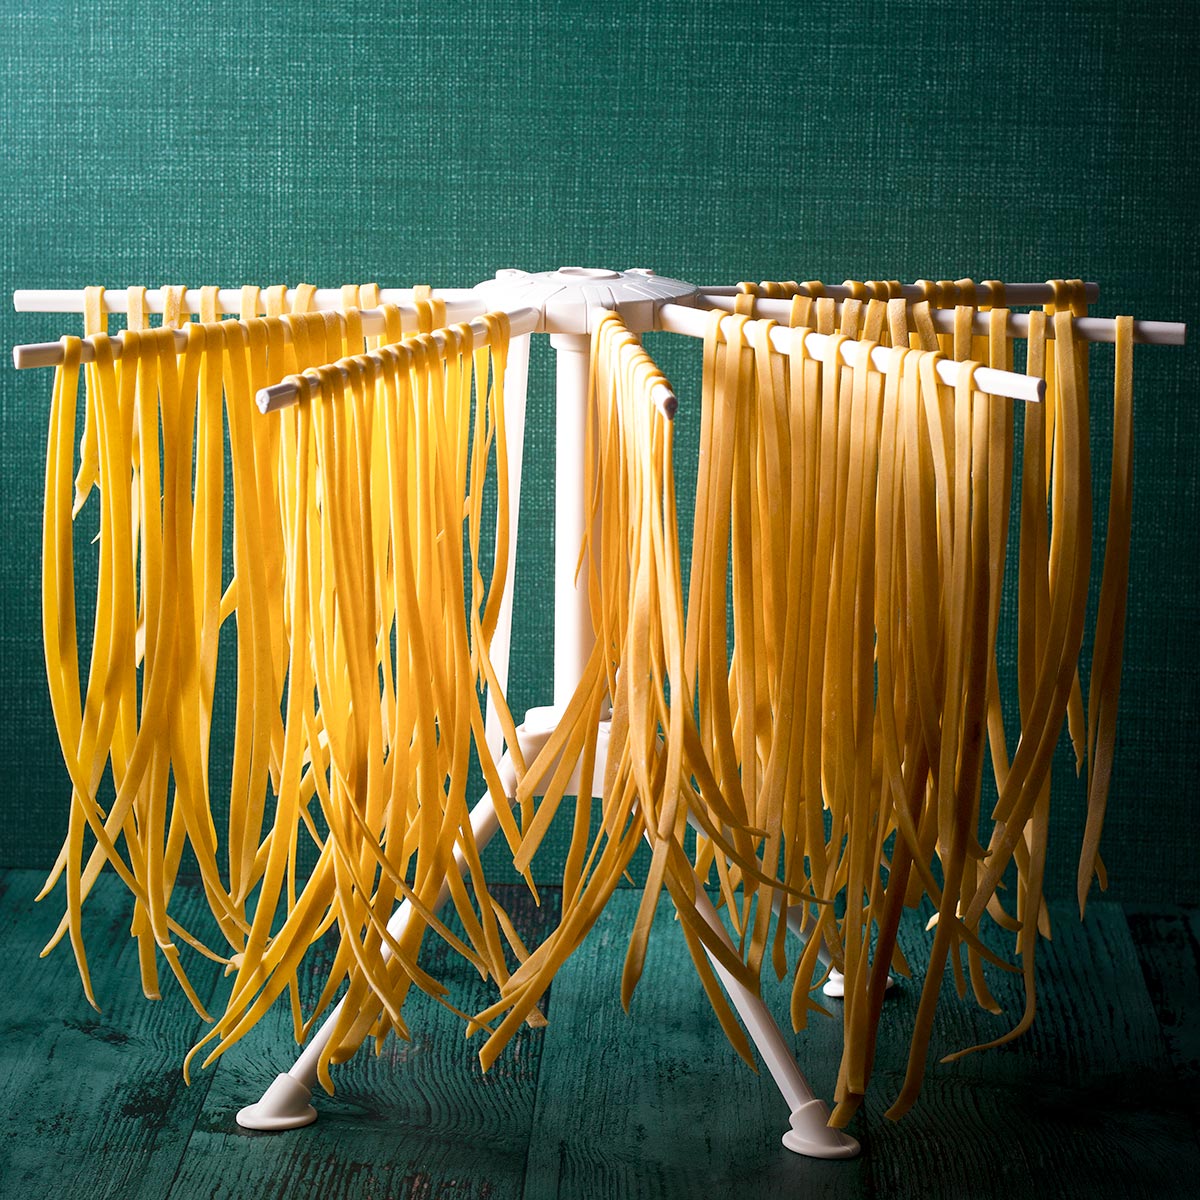
Hang the noodles on a pasta drying rack. Alternatively, you can hang them on clothes hangers that you suspend from the knobs of your kitchen cabinets.
You can also just lay the noodles out on a tray but make sure they are dusted with enough flour to prevent their sticking together.
Allow the pasta to dry for at least a couple of hours before cooking. I usually cut the noodles the day before I want to cook them and allow them to dry overnight. Once the noodles are dry, you can store them for weeks in an airtight container.
Why I allow fresh cut noodles time to dry
For years I cooked fresh pasta immediately after cooking it and it was still the most delicious pasta I'd ever eaten. So, yes - you can cook the pasta while it's fresh cut and skip the drying process entirely.
But, dried pasta is easier to cook and the cooked noodles will almost always have a better consistency and flavor than when cooked fresh. The reason is simple: fresh pasta cooks incredibly quickly. So quickly, that it has little time to absorb the salt from the water and can easily overcook, resulting in noodles that are on the mushy side.
Cooking dried pasta takes longer and makes it much easier for the cook to get the noodles to the perfect al dente texture.
For me, allowing the noodles time to dry is also a more convenient way to include homemade pasta into a busy week. I generally prepare the dough on a weekend afternoon when I'm doing other food prep stuff. The night before I want to cook the pasta, I devote 10 or 15 minutes to cutting the pasta dough into noodles and allow them to dry overnight. This makes pasta night as easy as boiling some water.
How to cook homemade pasta
Cooking homemade pasta isn't any different from cooking noodles from a package: Fill a pot with water, add plenty of salt, and bring the water to a boil. When the water is boiling, add the pasta and cook until the noodles are al dente.
What does al dente mean? The literal translation is "to the tooth". The term refers to pasta with a texture that's tender but also firm and chewy. It's that perfectly cooked space between when the pasta is hard and a bit crunchy and when it's overly soft and mushy.
But, I do have three more tips for perfectly cooked and flavorful pasta:
- Add a lot of salt to the cooking water
- Don't add too much water to the pot
- If the pasta is going into a sauce, undercook it
One of the most important things about cooking pasta is to add enough salt to the water. "Enough" salt is the amount of salt it takes for the water to taste salty. There is no salt in pasta dough. The pasta is seasoned during the cooking process. If you don't add enough salt to the cooking water for the pasta to be able to absorb some of that seasoning, the pasta will taste bland and flat.
The other important thing to consider if you are preparing a sauce that includes some of the pasta's cooking water, is to add just enough water to the pot to cover the noodles and give them some room to move. This will ensure that plenty of starch from the pasta makes it into the reserved pasta water. The starch in pasta water is what will help to thicken the sauce.
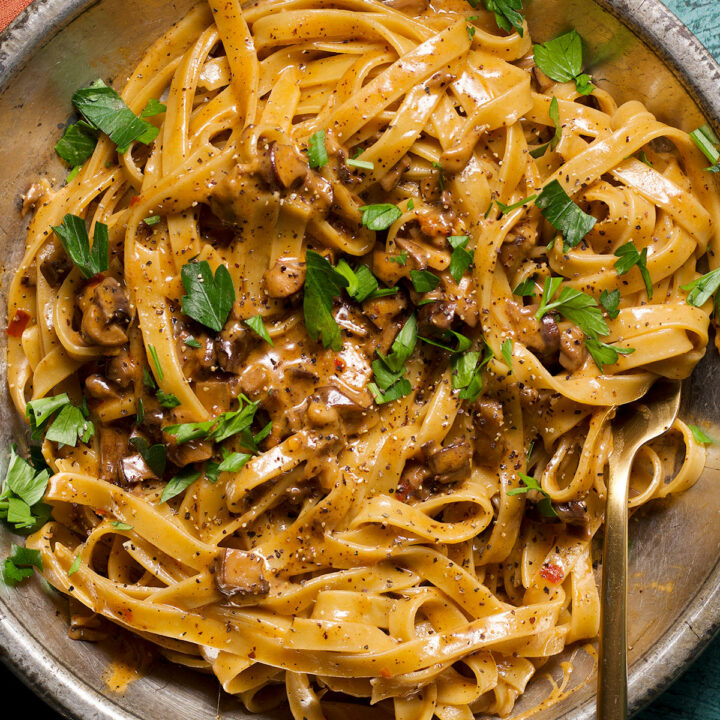
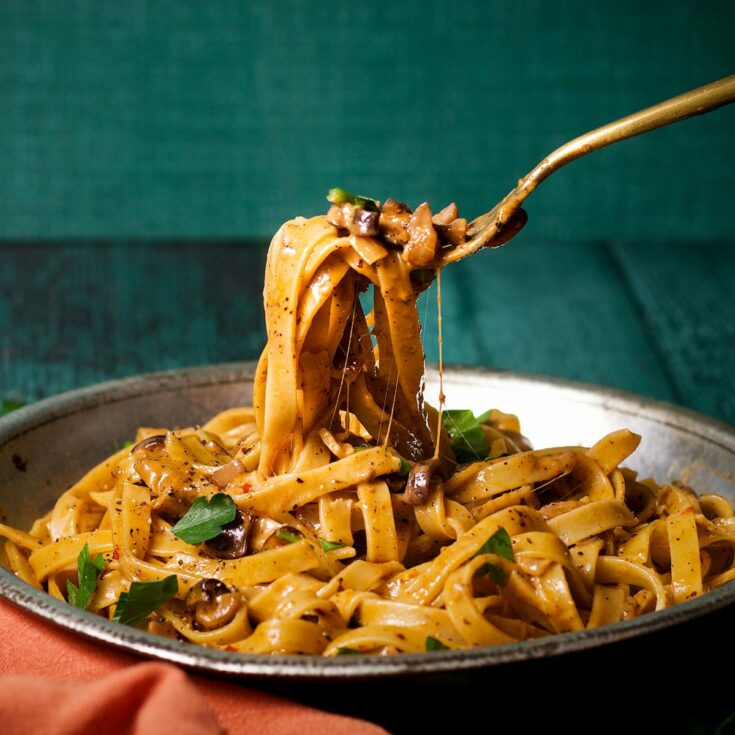
And finally, if you are making something like this creamy mushroom pasta, where the noodles are dumped into the pan with the sauce so they absorb some of the sauce's flavor, it's important to undercook them. The noodles will continue to cook in the sauce, so they need to be not quite cooked through when they go in there.
Also, unless I am adding the noodles to the sauce immediately after cooking them, I also rinse the noodles in cold water. This lowers their temperature and stops the cooking process.
One more thing to mention: even if your homemade noodles are completely dried, they will not take as much time to cook as most packaged pasta. Just watch the noodles carefully as they boil, pulling one out of the pot to bite into it from time to time to test their doneness.
If you are cooking fresh pasta that's just been rolled out and cut into noodles, the pasta will cook in a flash. Soft, fresh noodles only take a minute or two to cook, so don't walk away from that pot.
Favorite ways to serve homemade pasta
- Creamy Mushroom Pasta
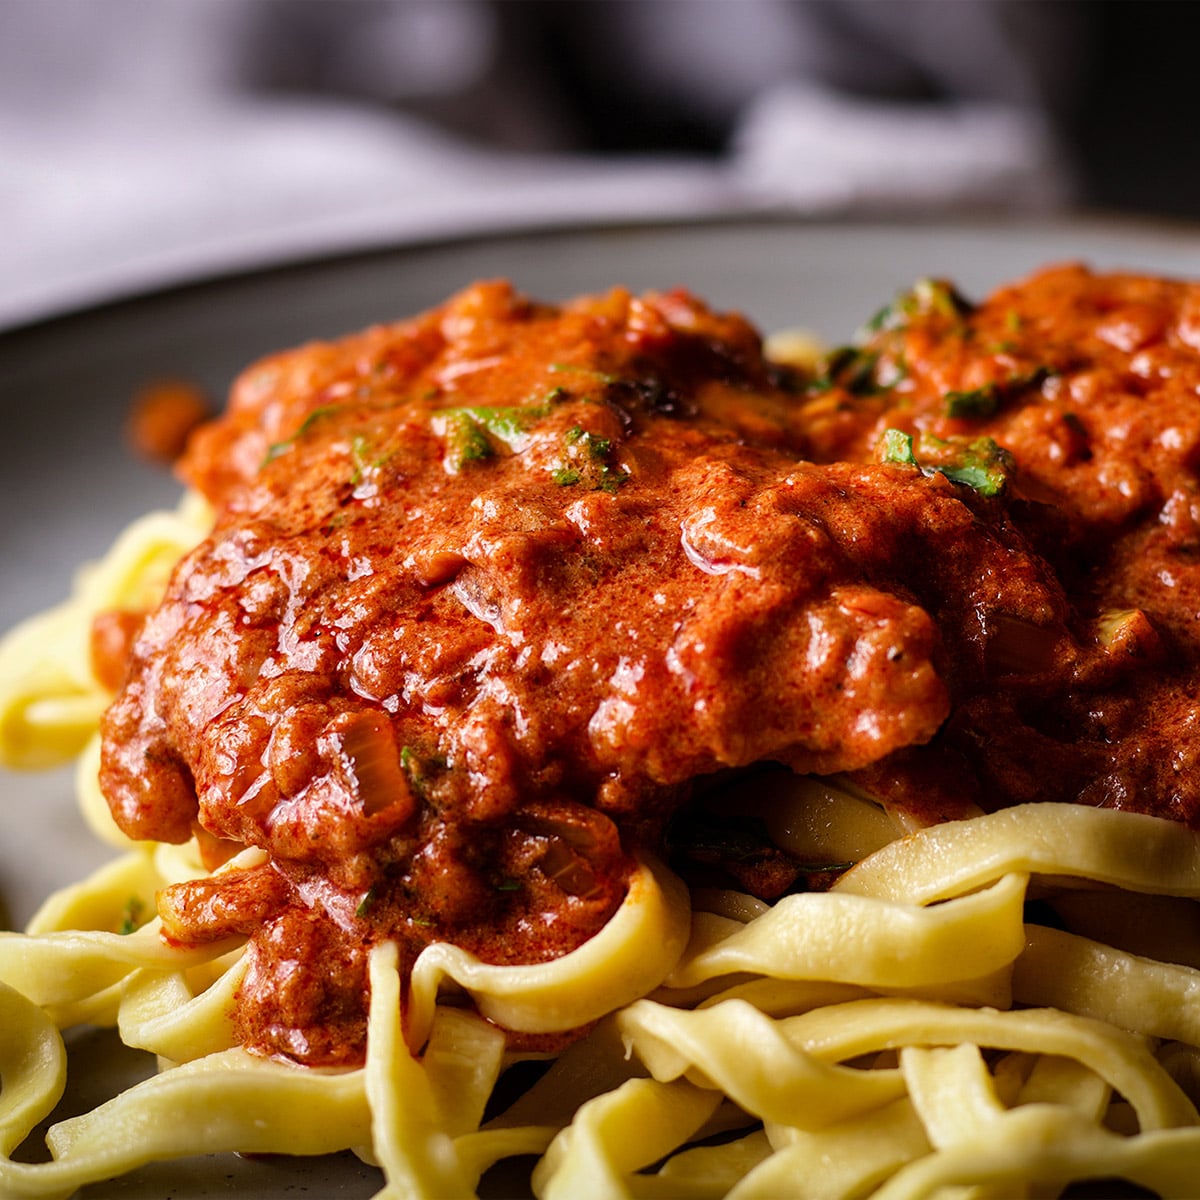
- Hungarian Chicken Paprikash with Egg Noodles
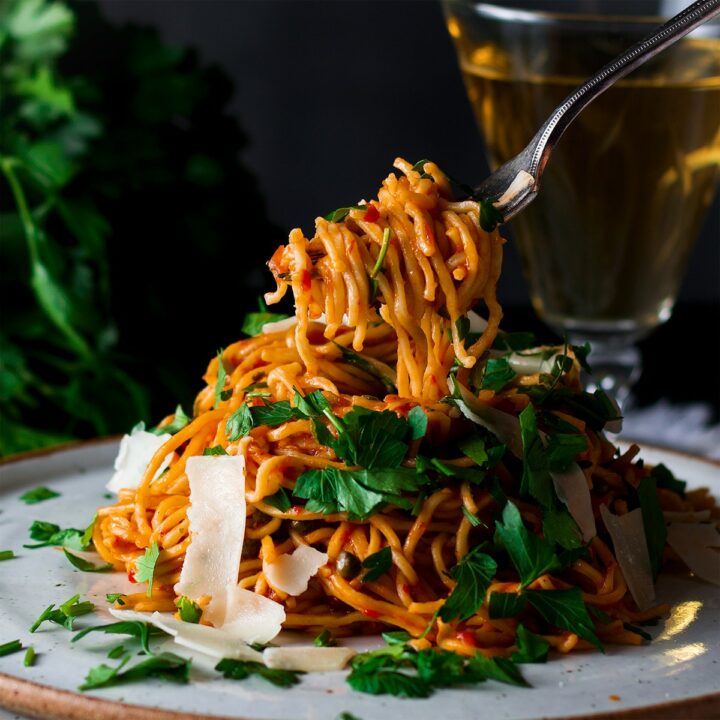
- Spaghetti Puttanesca {with Roasted or Canned Tomatoes}
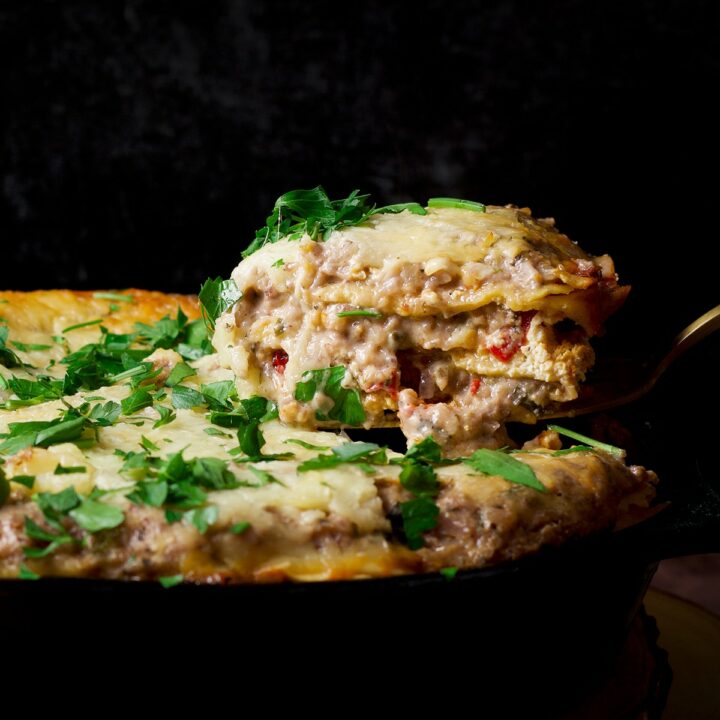
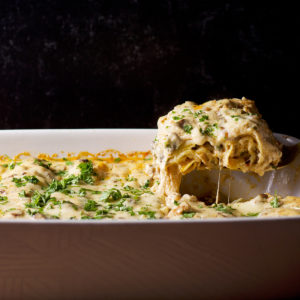
- Skillet Vegetable Lasagna with White Sauce
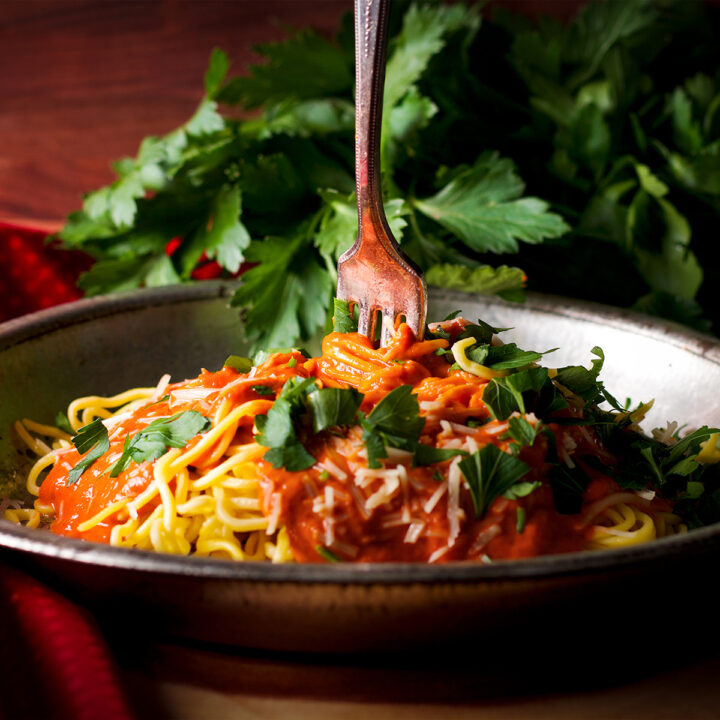
- Creamy Red Pepper Sauce
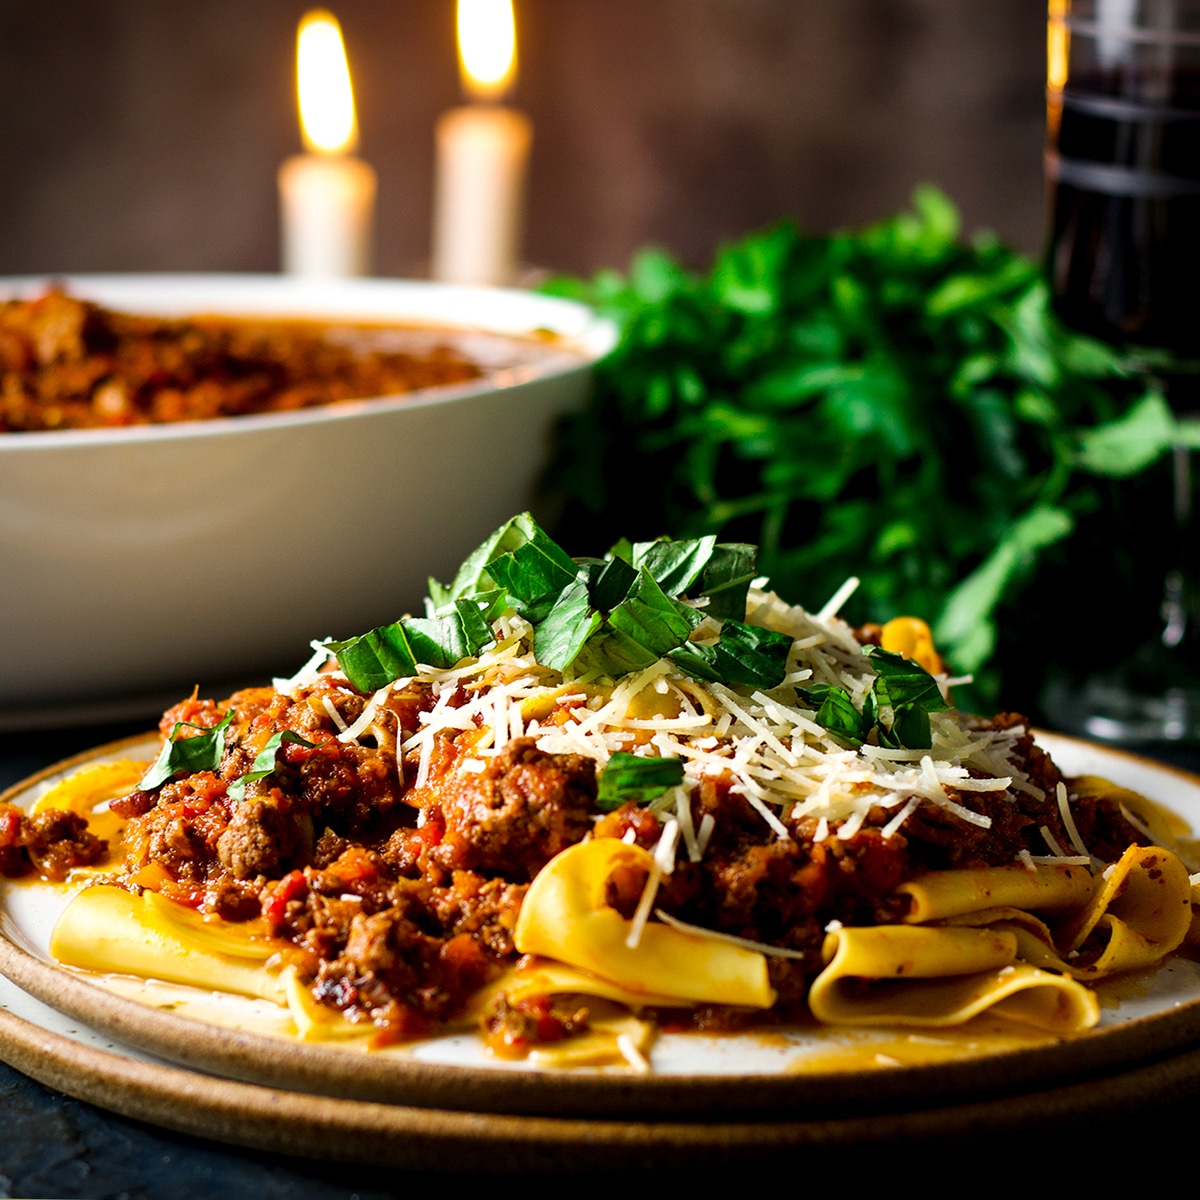
- Bolognese Sauce {with Bacon and Wine}
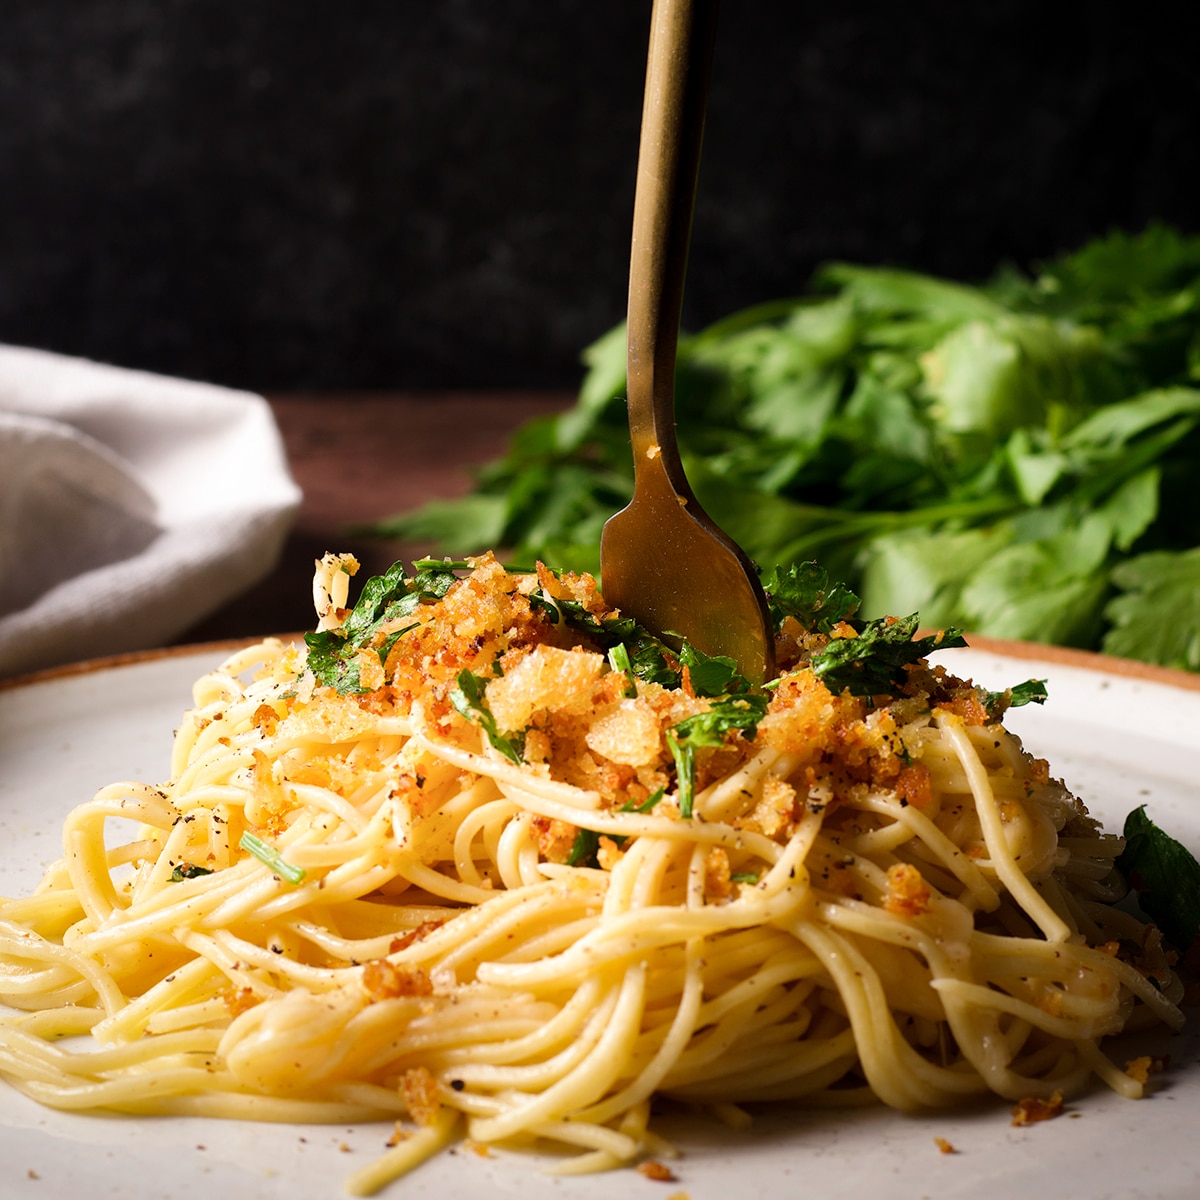
- Brown Butter Sauce Pasta with Crispy Bread Crumbs
- The Best Homemade Marinara Sauce


📖 Recipe
Homemade Pasta Recipe
Homemade past is such a treat and, once you master the basics, it's surprisingly easy and fun to make. Here's how to make a perfect batch of delicious homemade pasta.
Ingredients
- 1 ¾ cups (210 grams) all-purpose flour + more if necessary
- 1 whole egg
- 6 large egg yolks
- 2 teaspoon extra virgin olive oil
- 1 tablespoon whole milk
Instructions
- Add the flour to a large bowl or in a pile it onto a work surface. Use your hands to create a well in the center of the flour that's large enough to contain the eggs.
- Crack the egg and egg yolks into a bowl and use a small whisk or a fork to break them up and blend them together.
- Pour the eggs into the well you created in the flour and add the milk and olive oil. Use a fork to slowly begin to whisk the eggs into the flour.
- As you continue to incorporate more flour into the eggs, the mixture will begin to turn into a dough. Mixing the flour into the eggs bit by bit will help to create a smooth dough from the start.
- Dump the whole mess out onto a clean work surface when it becomes thick and difficult to whisk. At this point, it's unlikely that all of the flour has been incorporated, which is ok.
- Use your hands to knead the dough, incorporating as much flour as possible. The goal is to continue to add enough flour to get a dough that is smooth and pliable but not sticky.
- It's important to knead the dough for at least 10 minutes. The dough will be soft at first; as you knead, incorporate more and more of the flour. Continue kneading until you have a smooth elastic ball of dough that is not sticky at all, but not so dry that it's cracking. This will take at least 10 minutes. If you slice the dough with a sharp knife, you should see very few air bubbles.
- Wrap the dough tightly in plastic wrap and place it in the refrigerator. Allow it to rest in the refrigerator for at least 5 hours and up to a week.
- When you're ready to roll out the dough and cut it into noodles or lasagna sheets, remove it from the refrigerator, unwrap it, and set it on a surface that's been dusted with flour. Cut it into 4 equal pieces. Work with one piece at a time, keeping the remaining dough covered.
- Take one piece of dough and feed it through the rollers of a pasta machine set to it's widest setting. On my Marcato Pasta Maker, this means setting the rollers to "0".
- After rolling it through the machine, fold it in half and roll it through again. Continue this process of folding the dough in half and feeding it through the rollers with the machine at it's widest setting another 8 - 10 times. If at any point, the dough gets sticky, dust it with flour.
- Continue to feed the dough through the machine's rollers as you slowly narrow the width of the rollers. On my machine, the widest setting is "0", so I first narrow the rollers to "1" and feed the dough through then narrow it to "2" and feed it through again, and so forth. Dust the pasta with flour as often as necessary to keep it from feeling sticky.
- I rarely roll the pasta thinner than setting "4" or "5" on my machine because I prefer fat, chewy noodles. But, this is a matter of personal preference, so experiment to discover how thin you prefer the pasta to be before cutting it into noodles.
- Roll the sheet of pasta through the noodle cutting attachment to cut it into strands of spaghetti or fettuccini.
- Hang the noodles on a pasta drying rack. Alternatively, you can hang them on clothes hangers that you suspend from the knobs of your kitchen cabinets. You can also just lay the noodles out on a tray but make sure they are dusted with enough flour to prevent their sticking together.
- The pasta can be cooked immediately or given time to dry. I prefer the flavor and consistency of dried pasta, so recommend allowing the pasta to dry for at least a couple of hours before cooking. I usually cut the noodles the day before I want to cook them and allow them to dry overnight. Once the noodles are dry, you can store them for weeks in an airtight container.
- To cook the pasta, fill a pot with water and add enough salt to make the water taste salty. Set the pot over high heat and bring the water to a boil. Add the pasta and cook until the noodles are al dente (a texture that's tender but also firm and chewy). *See additional tips above for cooking homemade pasta.
Recommended Products
As an Amazon Associate and member of other affiliate programs, I earn from qualifying purchases.
-
 Pasta Drying Rack, Large Wood Pasta Rack Collapsible for Fresh Pasta Noodle Spaghetti Dryer Hanger Stand
 -
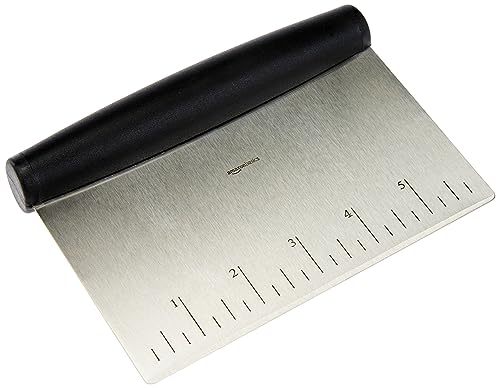
Amazon Basics Multi-Purpose Stainless Steel Scraper/Chopper with Contoured Grip, 6-Inch, Silver, Black
-
MARCATO Made in Italy Atlas 180 Classic Manual Pasta Machine, Chrome Steel. Makes Lasagne, Fettuccine & Tagliolini.


Nutrition Information:
Yield:
4Serving Size:
1Amount Per Serving: Calories: 360Total Fat: 12gSaturated Fat: 4gTrans Fat: 0gUnsaturated Fat: 8gCholesterol: 372mgSodium: 129mgCarbohydrates: 43gFiber: 1gSugar: 1gProtein: 17g

Anne Murphy says
Oh, I love the tutorial! Years ago I was given a pasta maker (which I wanted) and had no idea what I was doing... didn't even understand the difference between dry and fresh, and kept trying to make it like commercial dry spaghetti... I have made it more successfully since, but a post like this would have saved me so much trial and error!
Jacque Hastert says
We love making this recipe at home. It brings the whole family into the kitchen and we make so many memories while making a huge mess to clean up. Worth every minute!
Barb says
Yumm! What a great article, wonderful instruction and beautiful photos! Looks like lots of fun!
RebeccaBlackwell says
Thank you Barb! Cooking with Judy is always a blast and her pasta making skills are 👏👍🏻 ! xoxo